Delhi
+918076792323

'professional tools'

Items tagged with 'professional tools'

product image
Repairing And Maintaining UPS

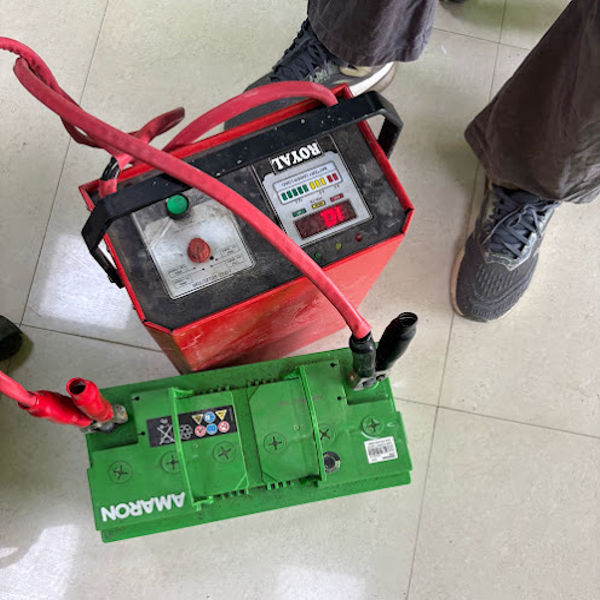
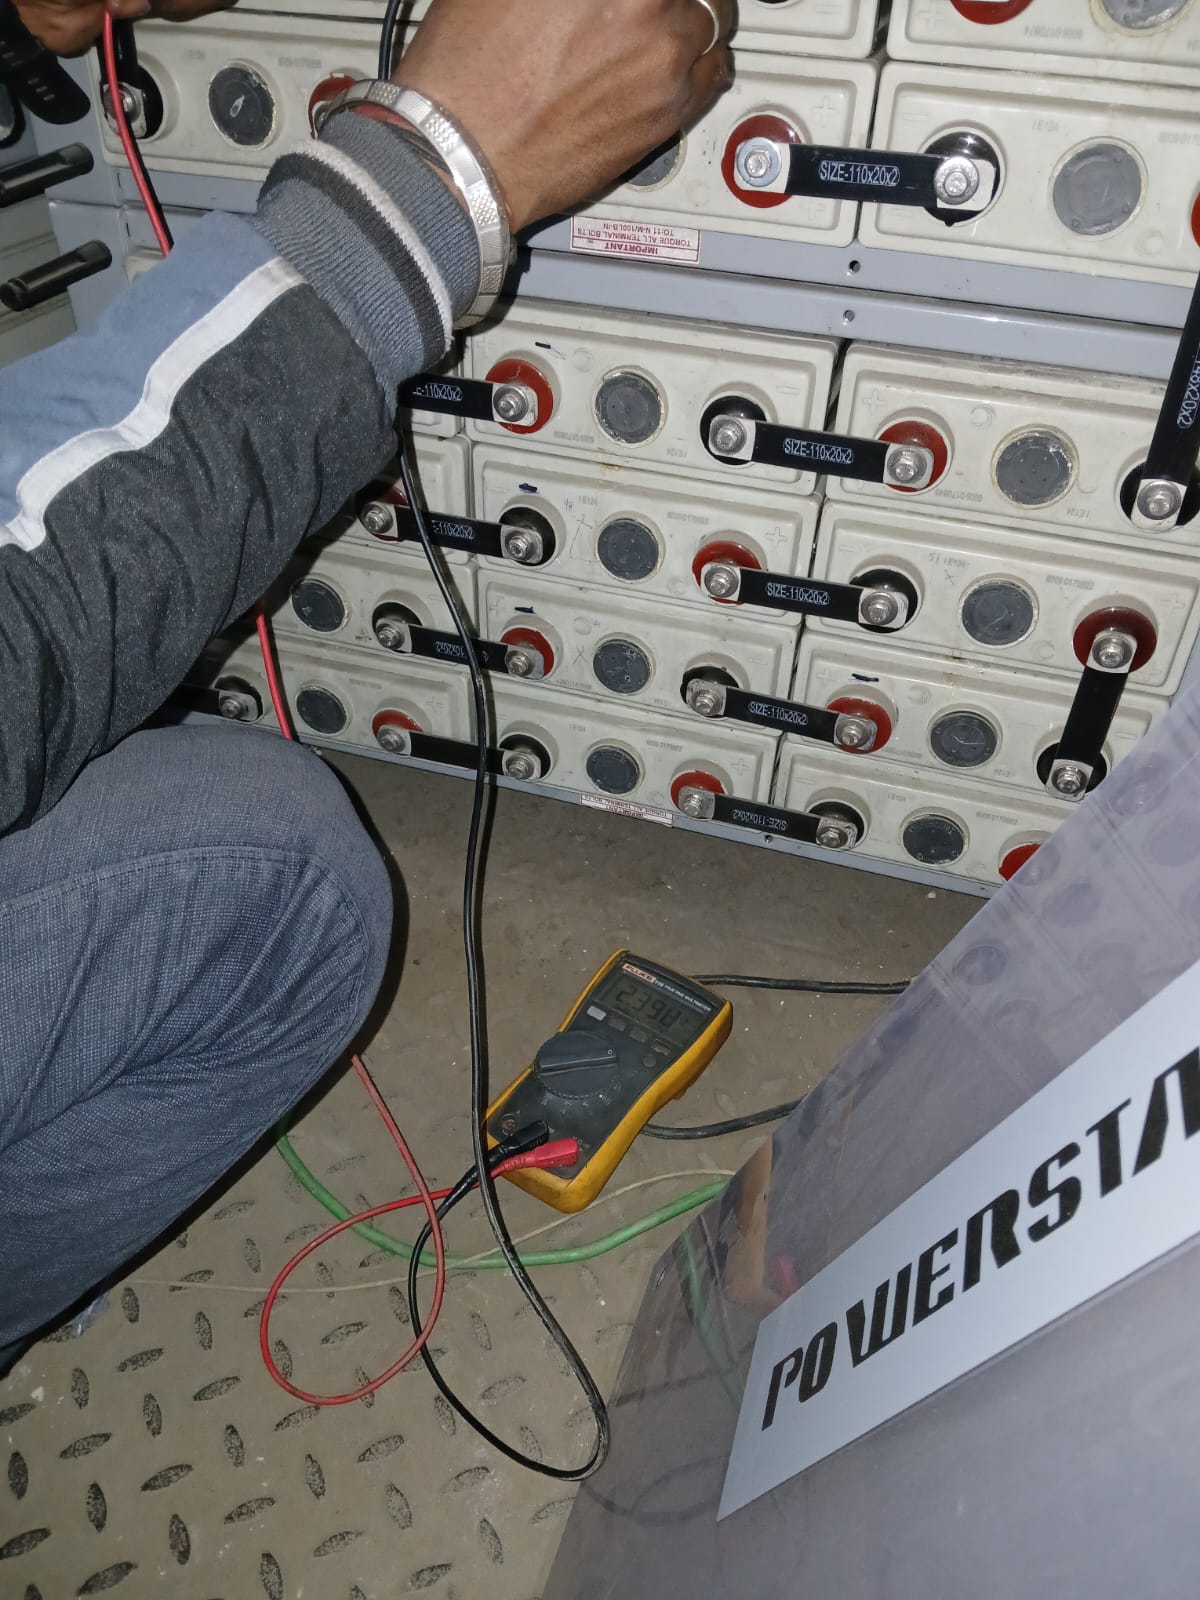
Repairing And Maintaining UPS (Uninterruptible Power Supply) batteries is crucial for ensuring the reliability and longevity of the power backup system. Here’s a detailed overview of UPS battery maintenance and repair practices. UPS Battery Types Lead-Acid Batteries: Valve-Regulated Lead Acid (VRLA): Maintenance-free and sealed, suitable for most UPS systems. Flooded Lead Acid: Requires periodic maintenance and water topping. Lithium-Ion Batteries: Increasingly used due to longer life and higher efficiency but may require specific handling protocols. Maintenance Practices Regular Inspections: Visual Check: Inspect batteries for physical damage, corrosion, or leaks. Look for swelling or bulging in case of lead-acid batteries. Connections: Ensure all terminals and connections are tight and free of corrosion. Cleaning: Clean battery terminals with a mixture of baking soda and water to remove corrosion. Rinse with clean water and dry thoroughly. Battery Testing: Voltage Checks: Regularly measure the voltage of each battery to identify weak cells. Load Testing: Perform load tests to ensure the battery can deliver the expected capacity under load conditions. Temperature Monitoring: Monitor battery temperature, especially in environments with high heat, as excessive temperatures can affect battery performance and lifespan. Electrolyte Level (for Flooded Batteries): Check and maintain the electrolyte levels in flooded lead-acid batteries. Top up with distilled water as necessary. Battery Health Monitoring: Use battery management systems (BMS) for advanced monitoring of battery health, state of charge, and state of health. Repair Practices Identifying Faults: Common issues include short-circuited cells, sulfation, and capacity loss. Use diagnostic tools to identify problems. Replacing Individual Batteries: If a battery within a pack fails, replace only the faulty battery if it’s compatible. However, it's often recommended to replace all batteries in a series to ensure uniform performance. Equalization Charging (for Flooded Batteries): Periodically perform equalization charging to balance the charge across all cells and prevent sulfation. Reconditioning: Some lead-acid batteries can be reconditioned through a process of controlled charging and discharging to restore capacity. This is not always successful and should be done by professionals. Battery Replacement: When batteries reach the end of their lifespan (typically 3-5 years for lead-acid), replace them with new ones. Ensure that replacements meet the manufacturer's specifications. Best Practices for Maintenance Documentation: Keep records of inspections, tests, and replacements to track battery performance over time. Environmental Conditions: Maintain an optimal environment for batteries—ideally, a cool, dry place free from excessive humidity and temperature fluctuations. Professional Servicing: Consider engaging professionals for complex repairs or maintenance tasks, especially for large or critical UPS systems. Training: Train personnel on proper handling, maintenance, and safety procedures related to UPS batteries. Conclusion Regular maintenance and timely repairs of UPS batteries are essential for ensuring the reliability of power backup systems. By implementing best practices, monitoring battery health, and addressing issues promptly, you can prolong the life of your UPS batteries and enhance overall system performance. If you have specific questions or need further details on any aspect, feel free to ask!

Send Message
product image
Ups Rental

UPS rental services provide temporary power backup solutions for various applications. Here’s an overview of what these services typically include: Key Features of UPS Rental Services Flexible Rental Terms: Options for short-term or long-term rentals, accommodating project-based or seasonal needs. Range of Capacities: Availability of different UPS systems, typically ranging from small (kVA) to large (up to several hundred kVA), catering to diverse requirements. Various Topologies: Access to different UPS technologies (online, offline, line-interactive) based on the specific power protection needs. Installation and Setup: Many services include professional installation, ensuring the system is configured correctly for optimal performance. Maintenance and Support: Regular maintenance, technical support, and emergency services may be included, ensuring reliability throughout the rental period. Transportation and Logistics: The rental company often handles delivery, setup, and pick-up of the UPS units. Battery Options: Availability of different battery configurations and types to suit the application, including maintenance-free options. Custom Solutions: Ability to provide tailored solutions based on specific site requirements and load assessments. Common Applications Events and Temporary Installations: Trade shows, conferences, and exhibitions requiring backup power. Construction Sites: Providing power to equipment and tools on temporary job sites. Data Centers: Emergency power during upgrades, maintenance, or outages. Testing and Development: Ensuring power stability during product testing or development phases. Natural Disasters: Providing emergency power in the aftermath of outages. Advantages of UPS Rental Services Cost-Effective: No capital expenditure is required, making it financially advantageous for short-term needs. No Long-Term Commitment: Flexibility to scale power needs up or down based on project requirements. Access to Latest Technology: Ability to utilize the latest UPS systems without the need for long-term investment. Reduced Maintenance Responsibility: The rental company typically manages maintenance, reducing operational burdens. Considerations Load Assessment: It's crucial to assess power needs accurately to select the appropriate UPS size and capacity. Service Agreements: Review terms and conditions, including support and maintenance provisions. Delivery and Setup Time: Ensure timely delivery and installation to meet project timelines. Local Regulations: Check compliance with local electrical and safety regulations. How to Choose a UPS Rental Service Reputation: Look for established companies with positive reviews and a track record in UPS rentals. Range of Equipment: Ensure the provider has a diverse inventory to meet various power needs. Customer Support: Consider the level of support offered, including technical assistance and emergency services. Pricing: Compare quotes from different providers to ensure competitive pricing. If you have specific requirements or questions about UPS rental services, feel free to ask!

Send Message
product image
UPS Rental & UPS Repairing Service

Repairing a Vertiv 1 kVA UPS involves a systematic approach to diagnosing and fixing issues. Here’s a detailed overview of the repair process, common problems, and considerations specific to Vertiv UPS systems: Repair Process Initial Assessment Gather Information: Document symptoms such as alarms, performance issues, or failure to start. Visual Inspection: Look for signs of physical damage, burnt components, or loose connections. Diagnosis Self-Diagnostic Tests: Many Vertiv UPS units have built-in diagnostic tools. Run these tests to identify fault codes. Multimeter Testing: Use a multimeter to check voltage levels, current, and resistance. Battery Health Check: Test the battery using a dedicated battery tester or multimeter to check for voltage and capacity. Inspect Fuses and Circuit Breakers: Check for blown fuses or tripped circuit breakers that could indicate a fault. Common Issues Battery Failure: The most common issue; batteries may need replacement due to age or improper charging. Capacitor Issues: Capacitors can degrade over time, leading to performance problems. Overheating: Caused by dust accumulation, blocked ventilation, or fan failure. Control Board Failures: Issues with the control board can affect functionality. Input/Output Problems: Fluctuations in input power or output voltage can indicate deeper electrical issues. Repair and Replacement Battery Replacement: Carefully remove old batteries and install new ones, ensuring correct polarity. Component Replacement: Replace any faulty components, such as capacitors or fuses, as identified during diagnostics. Soldering and Repairing Connections: Resolder any loose or damaged connections on the circuit board. Firmware Updates: If applicable, update the firmware for optimal performance. Testing After Repair Functional Testing: Run the UPS to ensure it operates correctly. Load Testing: Test under load conditions to verify performance and capacity. Battery Discharge Test: Simulate a power outage to ensure the UPS provides backup power as expected. Final Inspection Safety Checks: Verify that all repairs meet safety standards. Documentation: Record all repairs, parts replaced, and any other relevant information for future reference. Maintenance Tips Regular Testing: Conduct periodic self-tests and inspections to identify potential issues early. Battery Maintenance: Keep battery terminals clean and ensure connections are tight. Cooling: Ensure proper ventilation around the UPS to prevent overheating. Environment: Keep the UPS in a controlled environment, away from moisture and extreme temperatures. When to Seek Professional Help If issues are complex or beyond basic troubleshooting, consult a professional service. Use authorized Vertiv service centers for repairs to ensure quality and warranty compliance. Conclusion Repairing a Vertiv 1 kVA UPS requires careful diagnosis and knowledge of electrical systems. Regular maintenance can help prevent many common issues, ensuring reliable performance. For more complicated repairs, seeking professional help is recommended to ensure safety and effectiveness.

Send Message
product image
Apc Ups Repairing And Maintenance In Aurangabad Sonipat

Repairing and testing an APC UPS (Uninterruptible Power Supply) involves several steps to diagnose issues and ensure the unit functions properly. Here’s a detailed guide on how to approach this: Common Issues with APC UPS Battery Failure: Most common issue; symptoms include frequent beeping and inability to hold a charge. Overload: The UPS may beep continuously if connected devices exceed its capacity. Faulty Output: No power output despite being plugged in. Firmware Issues: May require updates or resets. Tools Needed Multimeter Screwdriver set Replacement batteries (if needed) Laptop or PC for firmware updates Diagnostic software (if applicable) Testing Procedure Visual Inspection: Check for physical damage, burnt components, or loose connections. Inspect the battery for any signs of swelling or leakage. Battery Testing: Disconnect the UPS from the wall outlet. Use a multimeter to measure the battery voltage. Compare it to the rated voltage (e.g., 12V for most lead-acid batteries). If the voltage is significantly lower, consider replacing the battery. Load Testing: Connect a load tester to the UPS and apply a known load (within the UPS capacity). Monitor the output voltage and see if it remains stable under load. Output Testing: Plug the UPS into the wall and turn it on. Measure the output voltage with a multimeter to ensure it’s delivering the correct voltage (typically around 120V or 230V depending on your region). Check if the UPS switches to battery mode when you disconnect it from the wall. Overload Testing: Gradually increase the load on the UPS until it beeps or shuts down. Verify that it returns to normal operation once the overload is removed. Repair Procedures Battery Replacement: Follow the manufacturer’s guidelines for replacing batteries. Dispose of old batteries responsibly. Firmware Updates: Connect the UPS to a computer. Use APC’s software (like PowerChute) to check for and install firmware updates. Component Repair: If internal components (like capacitors or fans) are damaged, soldering skills may be required for repairs or replacements. Reassembly: Carefully reassemble the UPS, ensuring all screws are tightened and no wires are pinched. Final Testing After repairs, conduct a full load test to ensure the UPS operates correctly under stress. Monitor for any unusual noises or overheating during operation. Safety Precautions Always ensure the UPS is unplugged before performing internal inspections or repairs. Handle batteries with care, as they can be hazardous. Conclusion Regular testing and maintenance of your APC UPS can extend its lifespan and ensure reliable performance. If issues persist after self-repair attempts, consider consulting a professional technician or contacting APC support for assistance.

Send Message
product image
Apc Ups Repairing In Jawahar Colony Faridabad

Repairing an APC UPS (Uninterruptible Power Supply) involves troubleshooting and addressing common issues that can arise over time. Here’s a comprehensive guide to help you diagnose and repair your APC UPS: Safety Precautions Disconnect Power: Always unplug the UPS before performing any repairs or inspections. Use PPE: Wear safety goggles and gloves to protect against electric shock. Work in a Ventilated Area: Ensure good airflow to prevent overheating. Common Issues and Solutions 1. UPS Won\\'t Turn On Check Power Source: Ensure the UPS is plugged in and the outlet is functional. Test the power cord for damage. Battery Issues: Inspect the battery for swelling, leaks, or corrosion. Use a multimeter to check battery voltage; if it\\'s significantly low, it may need replacement. 2. Battery Replacement Identify Battery Type: Refer to the user manual for the specific battery model. Remove the Old Battery: Open the UPS case (usually requires a screwdriver). Disconnect the old battery, noting the connections. Install the New Battery: Connect the new battery securely. Close the UPS case and ensure all screws are tightened. 3. Overheating Check Ventilation: Ensure that the UPS is in a well-ventilated area. Clear any obstructions around vents. Inspect Fans: Check if the internal fans are operational. Clean any dust accumulation. 4. Frequent Alarms or Beeping Load Issues: Ensure that the connected load does not exceed the UPS capacity. Disconnect non-essential devices and see if the alarm stops. Battery Health: Run a self-test (if your model supports it) to check battery status. 5. Self-Test Failure Check Battery Voltage: Use a multimeter to check the voltage of the battery. Replace if below the recommended level. Internal Issues: If the self-test consistently fails, the internal circuitry might need inspection by a professional. Tools and Equipment Needed Multimeter (for voltage checks) Screwdriver set Replacement batteries (as needed) Cleaning cloth or compressed air (for dust removal) Safety equipment (gloves, goggles) General Repair Steps Visual Inspection: Check for any visible signs of damage, such as burnt components or damaged connectors. Inspect for loose wires and connections. Testing Components: Batteries: Measure the voltage and ensure it\\'s within specifications. Fuses: Check fuses for continuity. Replace blown fuses as needed. Fans and Circuits: Ensure fans are operational and listen for unusual noises. Reassembly: After repairs, carefully reassemble the UPS. Ensure all screws and connections are secure before powering on. Testing the UPS: Once reassembled, plug in the UPS and perform a test by connecting a load. Monitor the UPS for any abnormal behavior. Conclusion Repairing an APC UPS can often be straightforward, particularly when it comes to replacing batteries or troubleshooting common issues. However, if the problem persists or if you are unsure about the repair process, it’s advisable to contact a professional technician or the manufacturer for support. Always refer to the specific user manual for detailed instructions related to your UPS model.

Send Message
product image
Amaron Batteries Repairing And Charging In sohna sector 36 Gurgaon

Repairing and charging Amaron batteries (or any lead-acid battery) requires caution and adherence to safety procedures. Here’s a comprehensive guide on how to repair and charge Amaron batteries: Safety Precautions Personal Protective Equipment (PPE): Always wear safety goggles and gloves. Ventilation: Work in a well-ventilated area to avoid inhaling harmful gases. Avoid Short Circuits: Be careful with tools and connections to prevent sparks or short circuits. Tools and Equipment Needed Multimeter (for checking voltage and condition) Battery charger compatible with lead-acid batteries Battery terminal cleaner or wire brush Distilled water (if applicable, for batteries that can be serviced) Insulation tape Safety equipment (gloves, goggles) Steps to Repair and Charge Amaron Batteries 1. Inspect the Battery Check for physical damage, such as cracks or leaks. Inspect terminals for corrosion. Clean terminals with a wire brush if necessary. 2. Test the Battery Use a multimeter to check the voltage. A fully charged 12V battery should read around 12.6 to 12.8 volts. If the voltage is significantly lower (e.g., below 12 volts), the battery may need charging or could be damaged. 3. Charging the Battery Select the Right Charger: Use a smart charger or a lead-acid battery charger that matches the battery’s specifications. Connect the Charger: Connect the positive (+) terminal of the charger to the positive terminal of the battery. Connect the negative (-) terminal of the charger to the negative terminal of the battery. Set the Charger: Choose the appropriate charging mode (usually a slow charge is best for lead-acid batteries). Monitor Charging: Charging time will vary; typically, it can take several hours to overnight. Monitor the charging process. 4. Check Battery Condition After Charging Once fully charged, use the multimeter to measure the voltage again. Perform a load test (if available) to ensure the battery can hold a charge under load. 5. Repairing Cells (if applicable) For Serviceable Batteries: If the battery has removable caps: Check the electrolyte level; add distilled water if needed. Ensure the specific gravity of the electrolyte is within the acceptable range (use a hydrometer). Re-seal the Caps: Make sure all caps are securely in place after checking. 6. Final Inspection and Reinstallation Ensure all connections are clean and secure. Reinstall the battery in the vehicle, connecting the positive terminal first, followed by the negative terminal. Use insulation tape to secure any exposed connections. Additional Tips Avoid Overcharging: Overcharging can damage the battery and reduce its lifespan. Always use a charger with an automatic shut-off feature. Regular Maintenance: Periodically check battery health, clean terminals, and keep the battery charged to prolong its life. Replacement: If the battery fails to hold a charge after multiple attempts, consider replacing it. Conclusion Repairing and charging Amaron batteries can extend their life if done correctly. Always prioritize safety and follow proper procedures to ensure efficient operation. If you\\'re uncertain about any step, consult a professional or refer to the manufacturer\\'s guidelines.

Send Message
product image
Battery Testing In Sonipat

Battery testing is essential to ensure optimal performance, safety, and longevity. Here are key details: Types of Tests: Voltage Test: Measures the battery's output voltage to check if it meets the specified range. Capacity Test: Assesses how much charge the battery can hold and deliver over time. Load Test: Simulates real-world usage to check how the battery performs under load. Internal Resistance Test: Evaluates the battery's internal resistance, indicating its health. Tools Used: Multimeter, hydrometer (for lead-acid batteries), battery analyzer, and load testers. Frequency: Regular testing is recommended, especially for backup power systems, to prevent unexpected failures. Indicators of a Faulty Battery: Low voltage, poor capacity, high internal resistance, or physical damage like swelling or leakage. Proper battery testing helps in proactive maintenance, ensuring reliability and safety.

Send Message
product image
Powerstack battery Testing

Powerstack batteries, typically used in UPS systems, inverters, and other energy storage applications, require proper testing and maintenance to ensure their efficiency, longevity, and reliability. If you need to perform battery testing on a Powerstack battery, here's a general guide for testing and monitoring its condition: Steps to Test Powerstack Batteries: 1. Visual Inspection Check for Physical Damage: Inspect the battery casing for any cracks, leaks, or bulges. Damaged batteries should be replaced. Clean the Terminals: Ensure the terminals are clean and free from corrosion. If there is any corrosion, clean the terminals with a mixture of baking soda and water. 2. Check Battery Voltage Measure the Open-Circuit Voltage (OCV): Use a digital voltmeter to measure the voltage across the battery terminals when it is not connected to any load. Compare the measured voltage to the battery’s rated voltage. A typical fully charged 12V lead-acid battery should read around 12.6 to 12.8 volts. For a 24V battery, you should see a voltage of around 25.2 to 26.0 volts. Undercharged Battery: If the voltage is significantly lower (e.g., 10.5V or less for a 12V battery), it may indicate that the battery is undercharged or faulty. 3. Load Testing Test under Load: Apply a load to the battery, simulating its normal working conditions. The load can be an inverter or UPS system that draws power from the battery. Monitor the voltage drop under load. The voltage should not drop drastically; otherwise, it may indicate that the battery is aging or weak. DC Discharge Test: If you have access to a battery analyzer or tester, you can perform a discharge test by applying a constant load and measuring the time it takes for the battery to reach a certain voltage cutoff. 4. Battery Charge Test Charge the Battery Fully: Use the manufacturer’s recommended charger to fully charge the battery. Most Powerstack systems will charge to full capacity in 6-12 hours, depending on the charger and battery size. Monitor Charging Parameters: If the battery doesn’t charge properly or takes longer than usual, it might indicate problems with the battery or the charger. End of Charge Voltage: For lead-acid batteries, the end-of-charge voltage should be around 14.4 to 15.0 volts for a 12V battery and 28.8 to 30.0 volts for a 24V battery. 5. Conduct a Specific Gravity Test (for Lead-Acid Batteries) Hydrometer Test: If your Powerstack battery is a lead-acid type, you can measure the specific gravity of the electrolyte inside the battery using a hydrometer. A fully charged battery will have a specific gravity of around 1.265 – 1.280. If the reading is low, it may indicate that one or more cells are faulty. 6. Perform a Battery Health Check (Advanced) Use a Battery Tester: There are advanced battery testers that can measure the internal resistance, capacity, and health of the battery. These testers usually simulate various load conditions and measure how well the battery performs. Internal Resistance: A higher internal resistance indicates aging and reduced capacity. A proper battery tester will show you this resistance reading, which helps in assessing the battery's remaining life. 7. Monitor for Temperature Batteries can heat up during charging and discharging. Check for unusual temperature rises that may indicate internal problems. Excessive heat can degrade battery life and may signal an issue with the battery or the charging system. Signs of a Failing Battery: Rapid Voltage Drop: If the voltage quickly drops under load, the battery is likely deteriorating. Short Runtime: If the battery runs out of charge much faster than expected, it could mean it's near the end of its life. Inconsistent Voltage Readings: Large fluctuations in voltage readings, especially when under load, can indicate a failing battery. Physical Damage: Swelling, leaks, or any visible damage to the battery indicates that it needs to be replaced. Battery Maintenance Tips: Regular Charging: Avoid deep discharges and always keep the battery charged. Environmental Conditions: Keep the battery in a cool, dry place to avoid overheating or damage due to extreme temperatures. Periodic Tests: Test the battery every 3-6 months to assess its health and ensure it’s functioning properly. Use the Right Charger: Always use the manufacturer's recommended charger to prevent overcharging or undercharging. Conclusion: Battery testing is critical for ensuring that your Powerstack battery continues to perform optimally. Regular testing helps in identifying potential problems early and maintaining the battery’s health. Always follow the manufacturer’s instructions and consult with a professional if you're unsure about the testing process.

Send Message
product image
solar panel

A solar panel is a device that converts sunlight into electricity using photovoltaic (PV) cells. Here's a quick summary: Types: Monocrystalline: High efficiency, long lifespan, more expensive. Polycrystalline: Lower efficiency, cheaper. Thin-film: Lightweight, flexible, lower efficiency, cheaper. How It Works: Sunlight hits the PV cells, generating electrical current (DC), which is converted into AC power by an inverter for household use. Benefits: Renewable energy source. Reduces electricity bills. Environmentally friendly (low carbon footprint). Low maintenance. Can be paired with battery storage for energy independence. Lifespan: Most panels last 25-30 years with minimal maintenance. Efficiency: Varies from 10% to 22%, with monocrystalline being the most efficient. Installation: Requires site assessment, permits, and professional installation.

Send Message

Still searching for
professional tools?