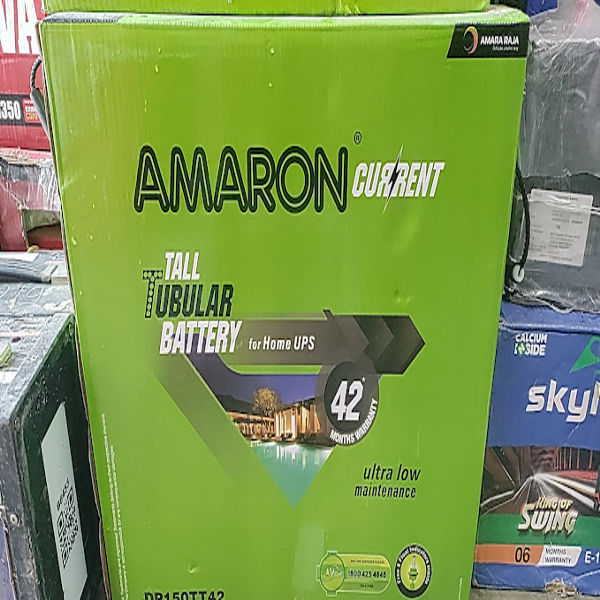
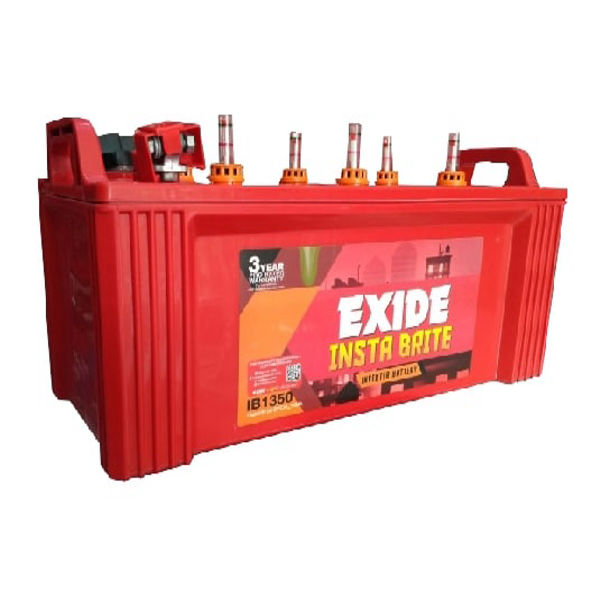
Noida
+918076792323

'common problems'

Items tagged with 'common problems'

product image
ALL TYPES OF UPS REPAIR

UPS (Uninterruptible Power Supply) repair typically involves diagnosing and fixing issues related to power failures, battery problems, or malfunctioning components. Here are some common repair tasks: Battery Replacement: Batteries in UPS units degrade over time and may need replacing. This is one of the most common repairs. Power Supply Issues: Problems with the internal power supply circuit or malfunctioning capacitors can cause a UPS to fail to charge or provide backup power. Overheating Issues: Dust buildup or fan failure can cause the unit to overheat, requiring cleaning or fan replacement. Inverter and Charger Problems: If the UPS isn't converting DC to AC power properly, it could be an inverter problem. Similarly, charger failures could stop the battery from charging. Internal Component Replacement: This may involve replacing transformers, fuses, or circuit boards that have failed.

Send Message
product image
2kva ups repair

Vertiv (formerly Emerson Network Power) is a leading provider of uninterruptible power supply (UPS) systems, power management, and thermal management solutions. Vertiv\'s UPS systems, including models with 2kVA capacity, are widely used in homes, offices, and small businesses to provide reliable power backup during grid power failures or fluctuations. When a Vertiv 2kVA UPS encounters issues, it may require repair, either due to a malfunctioning component or wear-and-tear over time. Here’s an overview of common problems, repair procedures, and troubleshooting steps for Vertiv 2kVA UPS repair: Common Problems in Vertiv 2kVA UPS UPS Not Turning On Possible Causes: Faulty battery or dead battery Blown fuse or circuit breaker Power supply input issue (fuse or switch) Repair Action: Check and replace the battery if necessary. Inspect the fuse or circuit breaker and replace if blown. Verify the input power connections. Frequent Switching to Battery Mode Possible Causes: Input power fluctuations or poor power quality Battery failure or degraded battery capacity UPS in bypass mode due to an internal fault Repair Action: Test the incoming voltage using a multimeter to ensure it’s within the UPS input range. Check the battery voltage; if it\'s low, consider replacing the battery. Check if the UPS is in bypass mode and reset it if necessary. UPS Not Charging the Battery Possible Causes: Faulty charger circuit Bad battery connections or corroded terminals Defective charging board Repair Action: Inspect battery terminals for corrosion and clean them. Test the charging voltage and check for proper charging circuit operation. If the charger board is defective, it may need to be replaced. Overheating and Shutdown Possible Causes: Overloaded UPS (too many devices connected) Poor ventilation or blocked air vents Faulty cooling fan Repair Action: Disconnect unnecessary devices and reduce the load. Ensure the UPS has proper ventilation and airflow around it. Check the fan for functionality; replace if faulty. UPS Producing Beeping Sound Possible Causes: Low battery Overload condition Internal fault or failure of components Repair Action: Replace or recharge the battery if it’s low. Disconnect some load if the UPS is overloaded. If the beeping persists, perform a deeper diagnostic of internal components (inverter, rectifier, etc.). Output Voltage Issues (Distorted or Incorrect Voltage) Possible Causes: Faulty inverter or rectifier circuit Problem with the output transformer Faulty output relay or PCB Repair Action: Measure the output voltage and compare it with the rated output. Inspect the inverter and rectifier circuits for any faults or blown components. Check the PCB for signs of damage or burnt components.

Send Message
product image
Repairing And Maintaining UPS

Repairing And Maintaining UPS (Uninterruptible Power Supply) batteries is crucial for ensuring the reliability and longevity of the power backup system. Here’s a detailed overview of UPS battery maintenance and repair practices. UPS Battery Types Lead-Acid Batteries: Valve-Regulated Lead Acid (VRLA): Maintenance-free and sealed, suitable for most UPS systems. Flooded Lead Acid: Requires periodic maintenance and water topping. Lithium-Ion Batteries: Increasingly used due to longer life and higher efficiency but may require specific handling protocols. Maintenance Practices Regular Inspections: Visual Check: Inspect batteries for physical damage, corrosion, or leaks. Look for swelling or bulging in case of lead-acid batteries. Connections: Ensure all terminals and connections are tight and free of corrosion. Cleaning: Clean battery terminals with a mixture of baking soda and water to remove corrosion. Rinse with clean water and dry thoroughly. Battery Testing: Voltage Checks: Regularly measure the voltage of each battery to identify weak cells. Load Testing: Perform load tests to ensure the battery can deliver the expected capacity under load conditions. Temperature Monitoring: Monitor battery temperature, especially in environments with high heat, as excessive temperatures can affect battery performance and lifespan. Electrolyte Level (for Flooded Batteries): Check and maintain the electrolyte levels in flooded lead-acid batteries. Top up with distilled water as necessary. Battery Health Monitoring: Use battery management systems (BMS) for advanced monitoring of battery health, state of charge, and state of health. Repair Practices Identifying Faults: Common issues include short-circuited cells, sulfation, and capacity loss. Use diagnostic tools to identify problems. Replacing Individual Batteries: If a battery within a pack fails, replace only the faulty battery if it’s compatible. However, it's often recommended to replace all batteries in a series to ensure uniform performance. Equalization Charging (for Flooded Batteries): Periodically perform equalization charging to balance the charge across all cells and prevent sulfation. Reconditioning: Some lead-acid batteries can be reconditioned through a process of controlled charging and discharging to restore capacity. This is not always successful and should be done by professionals. Battery Replacement: When batteries reach the end of their lifespan (typically 3-5 years for lead-acid), replace them with new ones. Ensure that replacements meet the manufacturer's specifications. Best Practices for Maintenance Documentation: Keep records of inspections, tests, and replacements to track battery performance over time. Environmental Conditions: Maintain an optimal environment for batteries—ideally, a cool, dry place free from excessive humidity and temperature fluctuations. Professional Servicing: Consider engaging professionals for complex repairs or maintenance tasks, especially for large or critical UPS systems. Training: Train personnel on proper handling, maintenance, and safety procedures related to UPS batteries. Conclusion Regular maintenance and timely repairs of UPS batteries are essential for ensuring the reliability of power backup systems. By implementing best practices, monitoring battery health, and addressing issues promptly, you can prolong the life of your UPS batteries and enhance overall system performance. If you have specific questions or need further details on any aspect, feel free to ask!

Send Message
product image
UPS Rental & UPS Repairing Service

Repairing a Vertiv 1 kVA UPS involves a systematic approach to diagnosing and fixing issues. Here’s a detailed overview of the repair process, common problems, and considerations specific to Vertiv UPS systems: Repair Process Initial Assessment Gather Information: Document symptoms such as alarms, performance issues, or failure to start. Visual Inspection: Look for signs of physical damage, burnt components, or loose connections. Diagnosis Self-Diagnostic Tests: Many Vertiv UPS units have built-in diagnostic tools. Run these tests to identify fault codes. Multimeter Testing: Use a multimeter to check voltage levels, current, and resistance. Battery Health Check: Test the battery using a dedicated battery tester or multimeter to check for voltage and capacity. Inspect Fuses and Circuit Breakers: Check for blown fuses or tripped circuit breakers that could indicate a fault. Common Issues Battery Failure: The most common issue; batteries may need replacement due to age or improper charging. Capacitor Issues: Capacitors can degrade over time, leading to performance problems. Overheating: Caused by dust accumulation, blocked ventilation, or fan failure. Control Board Failures: Issues with the control board can affect functionality. Input/Output Problems: Fluctuations in input power or output voltage can indicate deeper electrical issues. Repair and Replacement Battery Replacement: Carefully remove old batteries and install new ones, ensuring correct polarity. Component Replacement: Replace any faulty components, such as capacitors or fuses, as identified during diagnostics. Soldering and Repairing Connections: Resolder any loose or damaged connections on the circuit board. Firmware Updates: If applicable, update the firmware for optimal performance. Testing After Repair Functional Testing: Run the UPS to ensure it operates correctly. Load Testing: Test under load conditions to verify performance and capacity. Battery Discharge Test: Simulate a power outage to ensure the UPS provides backup power as expected. Final Inspection Safety Checks: Verify that all repairs meet safety standards. Documentation: Record all repairs, parts replaced, and any other relevant information for future reference. Maintenance Tips Regular Testing: Conduct periodic self-tests and inspections to identify potential issues early. Battery Maintenance: Keep battery terminals clean and ensure connections are tight. Cooling: Ensure proper ventilation around the UPS to prevent overheating. Environment: Keep the UPS in a controlled environment, away from moisture and extreme temperatures. When to Seek Professional Help If issues are complex or beyond basic troubleshooting, consult a professional service. Use authorized Vertiv service centers for repairs to ensure quality and warranty compliance. Conclusion Repairing a Vertiv 1 kVA UPS requires careful diagnosis and knowledge of electrical systems. Regular maintenance can help prevent many common issues, ensuring reliable performance. For more complicated repairs, seeking professional help is recommended to ensure safety and effectiveness.

Send Message
product image
UPS Repair

Repairing uninterruptible power supplies (UPS) involves a series of steps to diagnose and fix issues, ensuring they operate reliably. Here’s a comprehensive overview of the UPS repair process, common issues, and considerations: UPS Repair Process Initial Assessment Identify Symptoms: Gather information on the symptoms or problems, such as failure to start, battery issues, or alarms. Visual Inspection: Check for any visible damage, such as burned components, corrosion, or loose connections. Diagnosis Self-Diagnostics: Utilize built-in self-test features, if available, to diagnose issues. Multimeter Testing: Measure voltage, current, and resistance to identify electrical issues. Battery Testing: Check the health of the batteries using a battery tester or multimeter. Check Fuses and Circuit Breakers: Ensure all fuses and breakers are intact and functioning. Common Issues Battery Failure: Batteries may need replacement due to age or over-discharge. Capacitor Issues: Capacitors can fail due to heat or age, leading to performance issues. Cooling Problems: Blocked fans or insufficient ventilation can cause overheating. Control Board Malfunctions: Issues with the control board can affect the UPS's operation. Input/Output Issues: Problems with input power or output voltage can indicate faults in the UPS circuitry. Repair and Replacement Battery Replacement: Remove and replace old batteries with new ones of the same specifications. Component Replacement: Replace faulty capacitors, fuses, or other components as diagnosed. Resoldering Connections: Fix any broken or loose solder joints on the circuit board. Software/Firmware Updates: If applicable, update the UPS firmware to ensure optimal performance. Testing After Repair Functional Testing: After repairs, perform a complete functional test of the UPS. Load Testing: Test the UPS under load to ensure it can handle the required capacity. Battery Cycle Testing: Run the UPS on battery power to check for proper operation. Final Inspection Safety Check: Ensure all repairs meet safety standards. Documentation: Document the repairs, parts replaced, and any other relevant information for future reference. Maintenance Tips Regular Testing: Conduct regular self-tests and inspections to catch issues early. Battery Maintenance: Check battery connections and terminals periodically; keep them clean and tight. Environment Control: Ensure the UPS is kept in a cool, dry environment to extend its lifespan. Firmware Updates: Keep the UPS firmware updated for improved performance and security. Professional Repair Services When to Seek Help: If the issue is beyond basic troubleshooting or involves complex repairs, it’s best to consult a professional. Authorized Service Centers: Consider using authorized repair services for specific brands to ensure quality repairs. Conclusion Repairing a UPS requires careful diagnosis, knowledge of electrical systems, and attention to safety. Regular maintenance can help prevent many issues, ensuring your UPS remains reliable in providing backup power when needed. For complex repairs, professional services are recommended to ensure the job is done safely and effectively.

Send Message
product image
UPS Repair

When it comes to Vertiv 10kVA UPS repair and testing, it involves several key processes to ensure that the UPS functions correctly and reliably. Below are the details regarding Vertiv 10kVA UPS repair and testing: Vertiv 10kVA UPS Repair Common Issues: Battery Failure: Batteries may degrade over time and need replacement. Inverter Problems: The inverter may fail to convert DC to AC power. Overheating: Excessive heat can damage internal components. Faulty Charging Circuit: Issues with the charging system can prevent batteries from charging properly. Software Failures: Problems with firmware can affect UPS functionality. Repair Process: Diagnosis: Use diagnostic tools to identify issues. Check for error codes or alerts on the UPS display. Component Testing: Test batteries for capacity and voltage. Inspect the inverter and charging circuits for faults. Replacement of Parts: Replace faulty batteries with new ones. Repair or replace damaged circuit boards, inverters, or other components. Calibration: Calibrate the UPS settings to ensure optimal performance. Final Testing: Conduct a load test to verify that the UPS can handle its rated capacity. Vertiv 10kVA UPS Testing Testing Procedures: Visual Inspection: Check for physical damage, loose connections, or corrosion. Battery Testing: Measure the voltage and capacity of the batteries. Conduct a discharge test to ensure batteries can hold a charge. Load Testing: Connect a load to the UPS and monitor its performance. Ensure that the UPS can supply power for the specified duration under load. Transfer Time Testing: Measure the time it takes for the UPS to switch from mains to battery power and back. Efficiency Testing: Assess the efficiency of the UPS under various loads to ensure it meets manufacturer specifications. Maintenance Recommendations Regular Maintenance: Schedule regular checks (at least annually) to ensure all components are functioning correctly. Battery Replacement: Replace batteries every 3-5 years, depending on usage and manufacturer recommendations. Firmware Updates: Keep the UPS firmware updated to benefit from the latest features and fixes. Conclusion Proper repair and testing of Vertiv 10kVA UPS systems are crucial for ensuring reliable power backup. Regular maintenance can prevent unexpected failures and extend the lifespan of the unit. If you require further details on specific models or repair services, feel free to ask!

Send Message
product image
Amaron Tubular Battery In Faridabad

Amaron tubular batteries are a type of rechargeable battery known for their durability and long service life, making them ideal for deep-cycle applications. Here are some key points: Design: They use tubular plates, which provide a longer lifespan compared to flat plates, especially in deep discharge conditions. Applications: Commonly used in inverters, solar power systems, and other backup power solutions. Durability: Known for high resistance to corrosion and low maintenance requirements. Performance: Excellent charge retention and high power output, even in harsh conditions. Maintenance: Requires periodic checking of water levels and occasional equalization charging. Amaron is a well-known brand in the Indian market, popular for its robust and reliable battery solutions.

Send Message
product image
Powerstack battery Testing

Powerstack batteries, typically used in UPS systems, inverters, and other energy storage applications, require proper testing and maintenance to ensure their efficiency, longevity, and reliability. If you need to perform battery testing on a Powerstack battery, here's a general guide for testing and monitoring its condition: Steps to Test Powerstack Batteries: 1. Visual Inspection Check for Physical Damage: Inspect the battery casing for any cracks, leaks, or bulges. Damaged batteries should be replaced. Clean the Terminals: Ensure the terminals are clean and free from corrosion. If there is any corrosion, clean the terminals with a mixture of baking soda and water. 2. Check Battery Voltage Measure the Open-Circuit Voltage (OCV): Use a digital voltmeter to measure the voltage across the battery terminals when it is not connected to any load. Compare the measured voltage to the battery’s rated voltage. A typical fully charged 12V lead-acid battery should read around 12.6 to 12.8 volts. For a 24V battery, you should see a voltage of around 25.2 to 26.0 volts. Undercharged Battery: If the voltage is significantly lower (e.g., 10.5V or less for a 12V battery), it may indicate that the battery is undercharged or faulty. 3. Load Testing Test under Load: Apply a load to the battery, simulating its normal working conditions. The load can be an inverter or UPS system that draws power from the battery. Monitor the voltage drop under load. The voltage should not drop drastically; otherwise, it may indicate that the battery is aging or weak. DC Discharge Test: If you have access to a battery analyzer or tester, you can perform a discharge test by applying a constant load and measuring the time it takes for the battery to reach a certain voltage cutoff. 4. Battery Charge Test Charge the Battery Fully: Use the manufacturer’s recommended charger to fully charge the battery. Most Powerstack systems will charge to full capacity in 6-12 hours, depending on the charger and battery size. Monitor Charging Parameters: If the battery doesn’t charge properly or takes longer than usual, it might indicate problems with the battery or the charger. End of Charge Voltage: For lead-acid batteries, the end-of-charge voltage should be around 14.4 to 15.0 volts for a 12V battery and 28.8 to 30.0 volts for a 24V battery. 5. Conduct a Specific Gravity Test (for Lead-Acid Batteries) Hydrometer Test: If your Powerstack battery is a lead-acid type, you can measure the specific gravity of the electrolyte inside the battery using a hydrometer. A fully charged battery will have a specific gravity of around 1.265 – 1.280. If the reading is low, it may indicate that one or more cells are faulty. 6. Perform a Battery Health Check (Advanced) Use a Battery Tester: There are advanced battery testers that can measure the internal resistance, capacity, and health of the battery. These testers usually simulate various load conditions and measure how well the battery performs. Internal Resistance: A higher internal resistance indicates aging and reduced capacity. A proper battery tester will show you this resistance reading, which helps in assessing the battery's remaining life. 7. Monitor for Temperature Batteries can heat up during charging and discharging. Check for unusual temperature rises that may indicate internal problems. Excessive heat can degrade battery life and may signal an issue with the battery or the charging system. Signs of a Failing Battery: Rapid Voltage Drop: If the voltage quickly drops under load, the battery is likely deteriorating. Short Runtime: If the battery runs out of charge much faster than expected, it could mean it's near the end of its life. Inconsistent Voltage Readings: Large fluctuations in voltage readings, especially when under load, can indicate a failing battery. Physical Damage: Swelling, leaks, or any visible damage to the battery indicates that it needs to be replaced. Battery Maintenance Tips: Regular Charging: Avoid deep discharges and always keep the battery charged. Environmental Conditions: Keep the battery in a cool, dry place to avoid overheating or damage due to extreme temperatures. Periodic Tests: Test the battery every 3-6 months to assess its health and ensure it’s functioning properly. Use the Right Charger: Always use the manufacturer's recommended charger to prevent overcharging or undercharging. Conclusion: Battery testing is critical for ensuring that your Powerstack battery continues to perform optimally. Regular testing helps in identifying potential problems early and maintaining the battery’s health. Always follow the manufacturer’s instructions and consult with a professional if you're unsure about the testing process.

Send Message
product image
Exide Battery

Exide Insta Brite is a range of automotive batteries known for providing reliable and high-performance power to vehicles. The Insta Brite series is specially designed to deliver superior cranking power, longer battery life, and low maintenance requirements, making it a popular choice for a wide range of vehicles. Below are the key features and details of Exide Insta Brite batteries: 1. Key Features: High Cranking Power: Provides excellent starting power for engines, even under extreme weather conditions (both hot and cold). Maintenance-Free: Exide Insta Brite batteries are designed to be virtually maintenance-free, reducing the need for constant checks and refills. Durability: Built with robust construction to handle tough environments, ensuring a longer lifespan and reliable performance. Enhanced Safety: These batteries come with advanced safety features, reducing the risk of leakage or damage. Shock and Vibration Resistance: Built to withstand shocks and vibrations that are common in automotive applications. 2. Technology: Lead-Acid Technology: Like most automotive batteries, Exide Insta Brite uses lead-acid technology, which ensures high performance, reliability, and cost-effectiveness. Calcium-Calcium Technology: Some variants of Exide Insta Brite incorporate calcium-calcium technology, which helps in reducing water loss and improving the overall battery performance. Advanced Grid Design: This design improves the efficiency and strength of the battery, enhancing its cranking power and overall battery life. 3. Types of Vehicles: Passenger Cars: Exide Insta Brite is commonly used in standard passenger vehicles like sedans, hatchbacks, and SUVs. Two-Wheelers: Some models are also suitable for motorcycles and scooters. Commercial Vehicles: Some higher-capacity variants are suitable for commercial vehicles, including trucks and buses. 4. Advantages: Longer Life: Designed to provide a longer service life, reducing the frequency of replacements. Excellent Starting Performance: Ensures smooth engine start-ups, especially in cold weather conditions. Cost-Effective: Provides great value by offering a balance of performance, durability, and cost. Environmentally Friendly: Being a lead-acid battery, it is recyclable, making it more eco-friendly than some other types of batteries. 5. Available Sizes/Models: Exide Insta Brite batteries come in different sizes and specifications based on the vehicle’s requirements. These sizes are designed to meet the specific needs of the vehicle, whether it is a compact car or a larger commercial vehicle. 6. Warranty: Exide Insta Brite batteries often come with a manufacturer warranty, typically ranging from 12 months to 36 months depending on the model. The warranty covers manufacturing defects and performance issues, offering peace of mind for the customer.
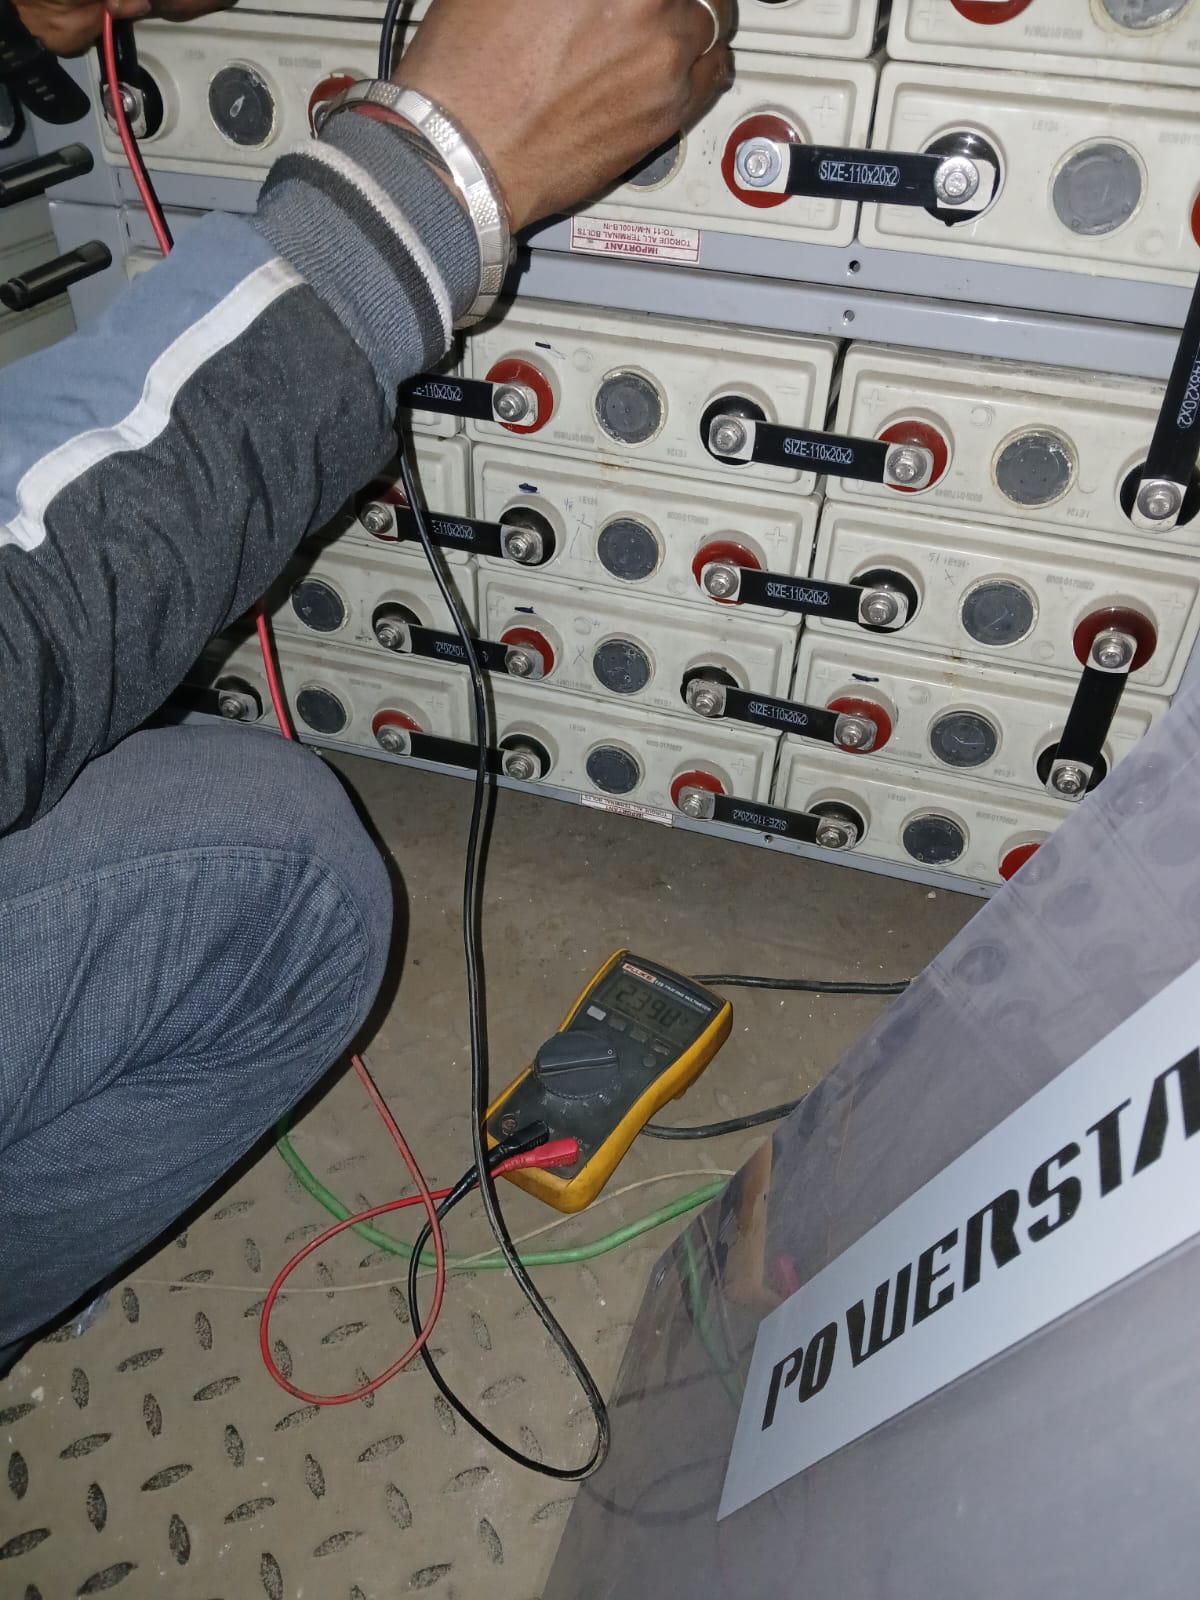
 7. Maintenance: Low Maintenance: While it is a maintenance-free battery, users should still check the battery for any physical damage or signs of wear. Regular Inspections: It's recommended to periodically check the battery's charge level and connections for safety and optimal performance. 8. Application Areas: Automotive: Passenger cars, SUVs, and trucks. Commercial Vehicles: Larger vehicles such as buses and cargo trucks. Motorcycles & Two-Wheelers: Some models are designed for use in motorcycles and scooters. 9. Price Range: The price of Exide Insta Brite batteries typically ranges from INR 3,000 to INR 10,000 or more, depending on the specific model, size, and vehicle type. 10. Availability: Exide Insta Brite batteries are widely available through Exide dealers, automotive battery retailers, and online platforms in various regions. 11. Popular Models in the Insta Brite Series: Exide Insta Brite IB 100: Known for high starting power, suitable for a range of vehicles. Exide Insta Brite IB 120: Offers more power for larger vehicles. Exide Insta Brite IB 150: Ideal for commercial vehicles, providing reliable performance under heavy load conditions.

Send Message

Still searching for
common problems?