Gurugram
+918076792323

'connection securely reconnect'

Items tagged with 'connection securely reconnect'

product image
Maintenance Tips for UPS Systems and Batteries​

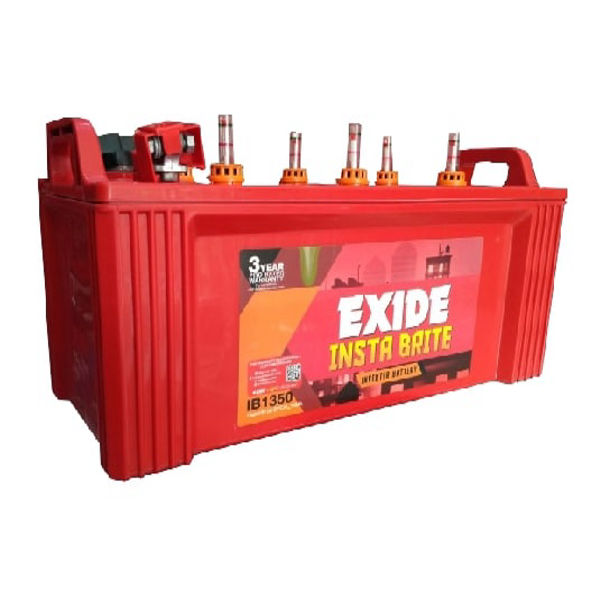
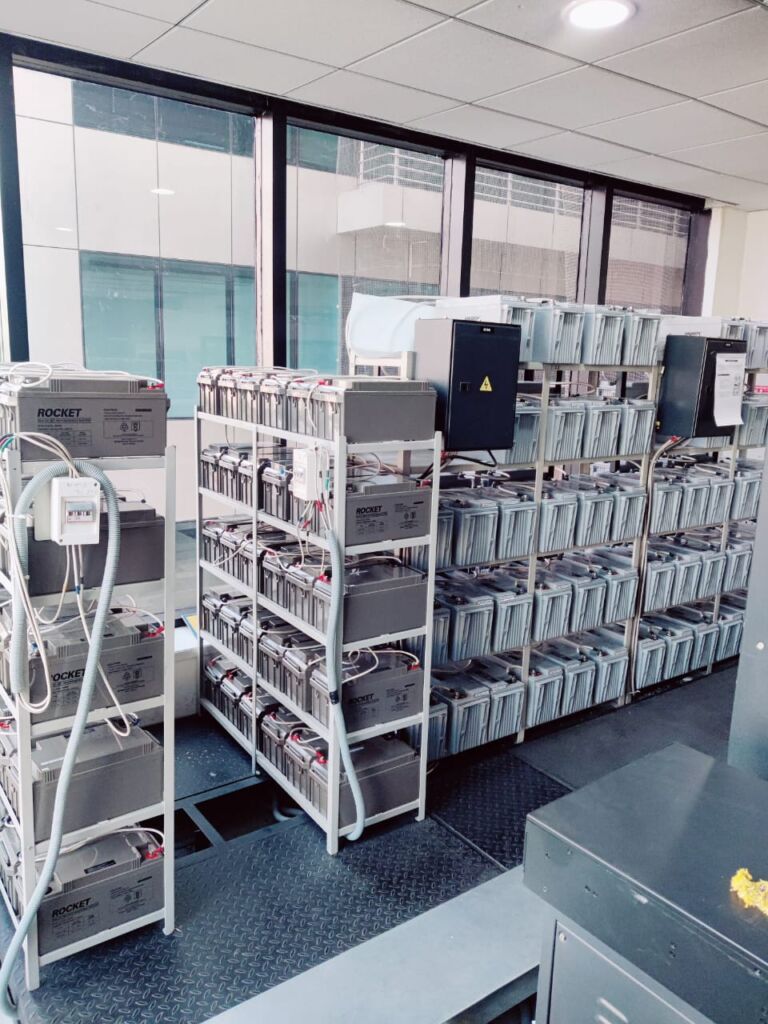
Maintaining your Uninterruptible Power Supply (UPS) system and its batteries is crucial for ensuring reliable performance and extending their lifespan. Here are some essential maintenance tips: 1. Regular Inspection Visual Checks: Inspect the UPS and batteries for any signs of physical damage, leaks, or corrosion. Connections: Ensure that all connections are secure and free from dust and corrosion. 2. Battery Maintenance Battery Testing: Regularly test the batteries for capacity and performance. Use a battery tester to check voltage and load. Clean Terminals: Keep battery terminals clean and free from corrosion. Use a mixture of baking soda and water to clean any corrosion, and ensure terminals are dry before reconnecting. Check Electrolyte Levels: For flooded lead-acid batteries, check the electrolyte levels regularly and top up with distilled water as needed. 3. Environmental Considerations Temperature Control: Keep the UPS and batteries in a cool, dry environment. High temperatures can reduce battery life significantly. Ventilation: Ensure proper ventilation around the UPS to prevent overheating. Avoid placing it in enclosed spaces without airflow. 4. Regular Testing Self-Test: Perform regular self-tests to ensure the UPS is functioning correctly. Most UPS systems have a built-in self-test feature. Load Testing: Conduct load tests periodically to ensure the UPS can handle the required load during a power outage. 5. Firmware and Software Updates Keep Software Updated: Regularly check for and install firmware updates for your UPS. This can improve performance and security. Monitoring Software: Use UPS monitoring software to track performance metrics and receive alerts for any issues. 6. Battery Replacement Follow Manufacturer Guidelines: Replace batteries according to the manufacturer\'s recommendations, typically every 3-5 years for lead-acid batteries. Dispose of Batteries Properly: Follow local regulations for the disposal of batteries to ensure environmental safety. 7. Load Management Avoid Overloading: Ensure that the total load connected to the UPS does not exceed its rated capacity. This can lead to overheating and reduced battery life. Balanced Load: Distribute the load evenly across all outlets to prevent any single outlet from being overloaded. 8. Documentation Keep Records: Maintain a log of maintenance activities, battery replacements, and any issues encountered. This can help in troubleshooting and planning future maintenance. 9. Professional Maintenance Schedule Professional Inspections: Consider having a qualified technician perform regular inspections and maintenance, especially for larger UPS systems. 10. User Training Educate Staff: Train staff on the proper use and maintenance of the UPS system, including how to respond in case of a power outage.

Send Message
product image
UPS

The VERTIV Liebert ITON CX 1000VA UPS is a line-interactive uninterruptible power supply designed for home and small office use. Below are the details regarding its unboxing and quick testing. Unboxing Details Packaging: The UPS comes securely packaged to prevent damage during transit. Ensure to check for any visible signs of damage upon receipt. Included Items: VERTIV Liebert ITON CX 1000VA UPS unit User manual and installation guide Power cord with UK outlet Warranty card Initial Inspection: Check the UPS for any physical damage. Verify that all components are included as per the manual. Quick Test Procedure Setup: Place the UPS in a well-ventilated area. Connect the power cord to the UPS and plug it into a wall outlet. Power On: Press the power button to turn on the UPS. Observe the LED indicators: Green Light: Indicates AC mode (normal operation). Red Light: Indicates a fault condition. Battery Mode Test: To test the battery mode, disconnect the UPS from the wall outlet. Ensure that the UPS switches to battery mode automatically. Check the runtime by connecting a load (e.g., a computer) and monitor how long the UPS can sustain power. Load Testing: Connect a load that draws approximately 120W (e.g., a standard desktop computer). Monitor the backup time, which should be around 30 minutes under this load. Recharge Time: After the test, reconnect the UPS to the wall outlet. Note that the typical recharge time is 6-8 hours to reach 90% capacity. Key Specifications Power Capacity: 1000 VA / 600 Watts Input Voltage: 220/230 VAC Output Waveform: Simulated Sine Wave Transfer Time: 2-6 ms Battery Type: 12 V / 7 Ah x 2 Typical Backup Time: 30 minutes at 120W load Dimensions: 369 x 141 x 160 mm Weight: 10 kg Conclusion The VERTIV Liebert ITON CX 1000VA UPS is a reliable solution for power protection in small setups. The unboxing and quick test confirm its functionality and performance, making it a suitable choice for users needing uninterrupted power supply for their electronic devices. Always refer to the user manual for detailed instructions and safety precautions.

Send Message
product image
Battery

The Amaron FLO 80D23L is a type of automotive battery commonly used in various vehicles, particularly in the Asian market. Here are the key details and specifications for the Amaron FLO 80D23L battery: General Specifications: Type: Lead-acid battery (Maintenance-free) Model: 80D23L Capacity: Typically around 70-75 Ah (Ampere-hour) Cold Cranking Amps (CCA): Approximately 600-650 CCA Voltage: 12V Dimensions: Approximately 23 cm (L) x 17 cm (W) x 22 cm (H) (dimensions can vary slightly by manufacturer) Weight: Approximately 19-22 kg (may vary) Features: Maintenance-Free: Designed to be maintenance-free under normal operating conditions, which means no need for water topping. Long Life: Known for its durability and long service life, often exceeding the average lifespan of conventional batteries. High Cranking Power: Provides excellent starting power, making it suitable for vehicles with high electrical demands. Vibration Resistance: Built to withstand vibrations, making it suitable for rough road conditions. Deep Cycle Capability: Can handle deep discharge cycles better than standard batteries. Applications: Suitable for a wide range of vehicles, including: Cars SUVs Light trucks Some commercial vehicles Warranty: Typically comes with a warranty period (often around 24 months) that may vary by region and retailer. Installation: Standard installation procedures apply. Ensure correct terminal connections and proper fit in the vehicle's battery compartment. Maintenance Tips: While the battery is maintenance-free, it’s advisable to periodically check for corrosion on terminals and ensure that the battery is securely mounted. Environmental Considerations: Like all lead-acid batteries, proper disposal and recycling are essential to minimize environmental impact. For the most accurate and detailed information, including specific dimensions and features, it’s always a good idea to consult the manufacturer's specifications or the retailer from which you intend to purchase the battery.

Send Message
product image
Apc Ups Repairing In Jawahar Colony Faridabad

Repairing an APC UPS (Uninterruptible Power Supply) involves troubleshooting and addressing common issues that can arise over time. Here’s a comprehensive guide to help you diagnose and repair your APC UPS: Safety Precautions Disconnect Power: Always unplug the UPS before performing any repairs or inspections. Use PPE: Wear safety goggles and gloves to protect against electric shock. Work in a Ventilated Area: Ensure good airflow to prevent overheating. Common Issues and Solutions 1. UPS Won't Turn On Check Power Source: Ensure the UPS is plugged in and the outlet is functional. Test the power cord for damage. Battery Issues: Inspect the battery for swelling, leaks, or corrosion. Use a multimeter to check battery voltage; if it's significantly low, it may need replacement. 2. Battery Replacement Identify Battery Type: Refer to the user manual for the specific battery model. Remove the Old Battery: Open the UPS case (usually requires a screwdriver). Disconnect the old battery, noting the connections. Install the New Battery: Connect the new battery securely. Close the UPS case and ensure all screws are tightened. 3. Overheating Check Ventilation: Ensure that the UPS is in a well-ventilated area. Clear any obstructions around vents. Inspect Fans: Check if the internal fans are operational. Clean any dust accumulation. 4. Frequent Alarms or Beeping Load Issues: Ensure that the connected load does not exceed the UPS capacity. Disconnect non-essential devices and see if the alarm stops. Battery Health: Run a self-test (if your model supports it) to check battery status. 5. Self-Test Failure Check Battery Voltage: Use a multimeter to check the voltage of the battery. Replace if below the recommended level. Internal Issues: If the self-test consistently fails, the internal circuitry might need inspection by a professional. Tools and Equipment Needed Multimeter (for voltage checks) Screwdriver set Replacement batteries (as needed) Cleaning cloth or compressed air (for dust removal) Safety equipment (gloves, goggles) General Repair Steps Visual Inspection: Check for any visible signs of damage, such as burnt components or damaged connectors. Inspect for loose wires and connections. Testing Components: Batteries: Measure the voltage and ensure it's within specifications. Fuses: Check fuses for continuity. Replace blown fuses as needed. Fans and Circuits: Ensure fans are operational and listen for unusual noises. Reassembly: After repairs, carefully reassemble the UPS. Ensure all screws and connections are secure before powering on. Testing the UPS: Once reassembled, plug in the UPS and perform a test by connecting a load. Monitor the UPS for any abnormal behavior. Conclusion Repairing an APC UPS can often be straightforward, particularly when it comes to replacing batteries or troubleshooting common issues. However, if the problem persists or if you are unsure about the repair process, it’s advisable to contact a professional technician or the manufacturer for support. Always refer to the specific user manual for detailed instructions related to your UPS model.

Send Message
product image
Amaron Batteries Repairing And Charging In sohna sector 36 Gurgaon

Repairing and charging Amaron batteries (or any lead-acid battery) requires caution and adherence to safety procedures. Here’s a comprehensive guide on how to repair and charge Amaron batteries: Safety Precautions Personal Protective Equipment (PPE): Always wear safety goggles and gloves. Ventilation: Work in a well-ventilated area to avoid inhaling harmful gases. Avoid Short Circuits: Be careful with tools and connections to prevent sparks or short circuits. Tools and Equipment Needed Multimeter (for checking voltage and condition) Battery charger compatible with lead-acid batteries Battery terminal cleaner or wire brush Distilled water (if applicable, for batteries that can be serviced) Insulation tape Safety equipment (gloves, goggles) Steps to Repair and Charge Amaron Batteries 1. Inspect the Battery Check for physical damage, such as cracks or leaks. Inspect terminals for corrosion. Clean terminals with a wire brush if necessary. 2. Test the Battery Use a multimeter to check the voltage. A fully charged 12V battery should read around 12.6 to 12.8 volts. If the voltage is significantly lower (e.g., below 12 volts), the battery may need charging or could be damaged. 3. Charging the Battery Select the Right Charger: Use a smart charger or a lead-acid battery charger that matches the battery’s specifications. Connect the Charger: Connect the positive (+) terminal of the charger to the positive terminal of the battery. Connect the negative (-) terminal of the charger to the negative terminal of the battery. Set the Charger: Choose the appropriate charging mode (usually a slow charge is best for lead-acid batteries). Monitor Charging: Charging time will vary; typically, it can take several hours to overnight. Monitor the charging process. 4. Check Battery Condition After Charging Once fully charged, use the multimeter to measure the voltage again. Perform a load test (if available) to ensure the battery can hold a charge under load. 5. Repairing Cells (if applicable) For Serviceable Batteries: If the battery has removable caps: Check the electrolyte level; add distilled water if needed. Ensure the specific gravity of the electrolyte is within the acceptable range (use a hydrometer). Re-seal the Caps: Make sure all caps are securely in place after checking. 6. Final Inspection and Reinstallation Ensure all connections are clean and secure. Reinstall the battery in the vehicle, connecting the positive terminal first, followed by the negative terminal. Use insulation tape to secure any exposed connections. Additional Tips Avoid Overcharging: Overcharging can damage the battery and reduce its lifespan. Always use a charger with an automatic shut-off feature. Regular Maintenance: Periodically check battery health, clean terminals, and keep the battery charged to prolong its life. Replacement: If the battery fails to hold a charge after multiple attempts, consider replacing it. Conclusion Repairing and charging Amaron batteries can extend their life if done correctly. Always prioritize safety and follow proper procedures to ensure efficient operation. If you're uncertain about any step, consult a professional or refer to the manufacturer's guidelines.

Send Message
product image
Lithium-ion battery repairing services

Lithium-ion battery repairing services focus on diagnosing, repairing, and refurbishing lithium-ion batteries used in various applications, such as electric vehicles, consumer electronics, and renewable energy systems. Here’s a comprehensive overview of such services: Overview of Services Battery Diagnosis Testing: Assessing the battery's health using specialized equipment to measure voltage, capacity, and internal resistance. Fault Identification: Identifying issues such as cell imbalance, dead cells, or internal short circuits. Repair Services Cell Replacement: Replacing defective cells within a battery pack to restore capacity and performance. Rebalancing: Balancing individual cells to ensure even charging and discharging, which prolongs battery life. Reconditioning: Cleaning and refurbishing battery contacts and connections to improve performance. Battery Management System (BMS) Repair BMS Testing: Checking the functionality of the BMS that monitors and manages the battery’s state. BMS Replacement: Replacing faulty BMS units to ensure safe and efficient battery operation. Battery Pack Rebuilding Repackaging: Rebuilding the entire battery pack, often using new or refurbished cells to increase capacity and lifespan. Re-encapsulation: Ensuring that the battery pack is securely encapsulated and insulated for safety. Data Recovery Data Retrieval: Recovering data from battery management systems or associated devices if they have become corrupted or lost. Common Applications Consumer Electronics: Smartphones, laptops, and tablets. Electric Vehicles: Cars, bikes, and scooters. Power Tools: Drills, saws, and other rechargeable tools. Renewable Energy Systems: Solar storage batteries and backup systems. Medical Devices: Mobility aids, monitoring devices, etc. Benefits of Repairing Lithium-Ion Batteries Cost-Effective: Often cheaper than purchasing a new battery. Environmental Impact: Reduces electronic waste by extending the life of existing batteries. Performance Restoration: Can restore batteries to near-original performance levels. Considerations Safety: Lithium-ion batteries can be hazardous; repairs should only be performed by qualified technicians with appropriate safety measures. Warranty: Check if repairing affects any existing warranty on the device or battery. Service Providers: Look for reputable service providers with good reviews and experience in lithium-ion battery technology. Typical Process Assessment: Customers bring in or ship batteries for assessment. Quote: After diagnosis, a cost estimate for repairs is provided. Repair: Upon approval, repairs are conducted, often within a specified timeframe. Testing: Post-repair testing to ensure the battery is functioning correctly. Return: The repaired battery is returned to the customer with information on care and maintenance. Finding a Service Provider Online Search: Look for local or online repair services specializing in lithium-ion batteries. Certifications: Ensure the service provider is certified and experienced in battery technology. Reviews: Check customer reviews and ratings for quality assurance. Conclusion Lithium-ion battery repairing services provide essential support for maintaining and extending the life of various battery-operated devices. By selecting a qualified service provider, customers can achieve significant savings and environmental benefits while ensuring their devices operate reliably.

Send Message
product image
Exide Battery

Exide Insta Brite is a range of automotive batteries known for providing reliable and high-performance power to vehicles. The Insta Brite series is specially designed to deliver superior cranking power, longer battery life, and low maintenance requirements, making it a popular choice for a wide range of vehicles. Below are the key features and details of Exide Insta Brite batteries: 1. Key Features: High Cranking Power: Provides excellent starting power for engines, even under extreme weather conditions (both hot and cold). Maintenance-Free: Exide Insta Brite batteries are designed to be virtually maintenance-free, reducing the need for constant checks and refills. Durability: Built with robust construction to handle tough environments, ensuring a longer lifespan and reliable performance. Enhanced Safety: These batteries come with advanced safety features, reducing the risk of leakage or damage. Shock and Vibration Resistance: Built to withstand shocks and vibrations that are common in automotive applications. 2. Technology: Lead-Acid Technology: Like most automotive batteries, Exide Insta Brite uses lead-acid technology, which ensures high performance, reliability, and cost-effectiveness. Calcium-Calcium Technology: Some variants of Exide Insta Brite incorporate calcium-calcium technology, which helps in reducing water loss and improving the overall battery performance. Advanced Grid Design: This design improves the efficiency and strength of the battery, enhancing its cranking power and overall battery life. 3. Types of Vehicles: Passenger Cars: Exide Insta Brite is commonly used in standard passenger vehicles like sedans, hatchbacks, and SUVs. Two-Wheelers: Some models are also suitable for motorcycles and scooters. Commercial Vehicles: Some higher-capacity variants are suitable for commercial vehicles, including trucks and buses. 4. Advantages: Longer Life: Designed to provide a longer service life, reducing the frequency of replacements. Excellent Starting Performance: Ensures smooth engine start-ups, especially in cold weather conditions. Cost-Effective: Provides great value by offering a balance of performance, durability, and cost. Environmentally Friendly: Being a lead-acid battery, it is recyclable, making it more eco-friendly than some other types of batteries. 5. Available Sizes/Models: Exide Insta Brite batteries come in different sizes and specifications based on the vehicle’s requirements. These sizes are designed to meet the specific needs of the vehicle, whether it is a compact car or a larger commercial vehicle. 6. Warranty: Exide Insta Brite batteries often come with a manufacturer warranty, typically ranging from 12 months to 36 months depending on the model. The warranty covers manufacturing defects and performance issues, offering peace of mind for the customer. 7. Maintenance: Low Maintenance: While it is a maintenance-free battery, users should still check the battery for any physical damage or signs of wear. Regular Inspections: It's recommended to periodically check the battery's charge level and connections for safety and optimal performance. 8. Application Areas: Automotive: Passenger cars, SUVs, and trucks. Commercial Vehicles: Larger vehicles such as buses and cargo trucks. Motorcycles & Two-Wheelers: Some models are designed for use in motorcycles and scooters. 9. Price Range: The price of Exide Insta Brite batteries typically ranges from INR 3,000 to INR 10,000 or more, depending on the specific model, size, and vehicle type. 10. Availability: Exide Insta Brite batteries are widely available through Exide dealers, automotive battery retailers, and online platforms in various regions. 11. Popular Models in the Insta Brite Series: Exide Insta Brite IB 100: Known for high starting power, suitable for a range of vehicles. Exide Insta Brite IB 120: Offers more power for larger vehicles. Exide Insta Brite IB 150: Ideal for commercial vehicles, providing reliable performance under heavy load conditions.

Send Message
product image
Battery Replacement In Faridabad

Battery replacement is a common maintenance task for various types of power systems, including solar systems, electric vehicles (EVs), UPS (uninterruptible power supplies), and other battery-powered devices. The process and requirements can vary depending on the type of battery used. Below, I'll provide an overview of common types of batteries and the replacement process for each. Types of Batteries and Their Replacement Process 1. Lead-Acid Batteries Common Types: Flooded Lead-Acid (FLA): Requires regular maintenance, such as adding distilled water to the cells. Sealed Lead-Acid (SLA): Maintenance-free and does not require water addition. Absorbent Glass Mat (AGM): A type of SLA battery where the electrolyte is absorbed in glass mats. Gel Lead-Acid Batteries: These use a gel electrolyte instead of liquid and are often used in deep-cycle applications. Replacement Process: Turn off the system: Ensure the system is powered off, and disconnect it from the grid or load. Safety precautions: Wear protective gear, including gloves and goggles, since lead-acid batteries contain sulfuric acid and produce flammable gases. Disconnect terminals: Always disconnect the negative terminal first, followed by the positive terminal. Remove old batteries: Lift and remove the batteries carefully, especially if they're heavy. Clean battery terminals: Inspect and clean the terminals, and remove any corrosion using a mixture of baking soda and water. Install new batteries: Place the new battery in the same configuration as the old one, then reconnect the positive terminal first, followed by the negative terminal. Check the system: Power on the system and check the voltage and charging status. Maintenance Tips: Regularly check the electrolyte levels in flooded batteries. Clean terminals and ensure the battery box or tray is secure. 2. Lithium-Ion Batteries Common Types: Lithium Iron Phosphate (LiFePO4): Common in solar systems and EVs due to its high efficiency and long lifespan. Lithium Nickel Manganese Cobalt (NMC): Found in high-power applications such as EVs and power tools. Lithium Manganese (LiMn2O4): Often used in EVs, power tools, and other high-power applications. Lithium Polymer (LiPo): Typically used in small devices like drones, power banks, and mobile phones. Replacement Process: Turn off the system: Disconnect the power source or system. Safety precautions: Lithium-ion batteries are generally safe but should be handled carefully to avoid overheating, short-circuiting, or damage. Disconnect terminals: Start by disconnecting the negative terminal followed by the positive terminal. Remove the old battery: Lithium-ion batteries are typically lighter and easier to replace than lead-acid batteries. Install the new battery: Place the new battery in the same orientation and secure it. Reconnect terminals: Attach the positive terminal first, followed by the negative terminal. Check the system: Power on the system, and monitor the battery's charging and discharging to ensure it's working properly. Maintenance Tips: Lithium-ion batteries require minimal maintenance, but always ensure they are charged within the recommended voltage range. Battery Management System (BMS) should be monitored to ensure proper functioning and safety. Conclusion: Battery replacement depends on the type of battery and the application. For solar systems, lead-acid, and lithium-ion are the most common, each requiring specific attention during installation. Lead-acid batteries need regular maintenance, especially flooded types. Lithium-ion batteries are easier to replace and have a longer lifespan with minimal maintenance. Always follow safety guidelines when handling batteries, especially lead-acid or lithium-ion, and ensure proper recycling and disposal of old batteries to avoid environmental hazards.

Send Message
product image
5 kW solar system installed at nooh school

Universal Power team has installed a 5 kW solar system at nooh school Key Details of the 5 kW Solar System Installation at Nooh School: Solar Power Generation: A 5 kW system typically generates around 20-25 kWh per day depending on sunlight hours and weather conditions. Annual Energy Production: The system could produce around 7, 300 to 9, 125 kWh annually, which can cover a significant portion of the school\'s energy needs. System Components: Solar Panels: Typically, 15-20 panels with a capacity of around 250W-330W each. Inverter: A 5 kW inverter is used to convert the DC power produced by the panels into AC power. Mounting Structure: The solar panels are mounted on the roof or ground, depending on the school\'s infrastructure. Grid Connection: The system is likely connected to the grid, allowing excess energy to be fed back into the grid via net metering, helping reduce electricity costs for the school. Benefits for Nooh School: Cost Savings: The school will benefit from reduced electricity bills by offsetting its grid power usage with solar energy. Sustainability: The system will contribute to a reduction in carbon emissions, helping the school be more environmentally responsible. Educational Opportunity: The solar installation can serve as a live example for students, providing them with a practical demonstration of renewable energy technology. Maintenance: The system requires minimal maintenance, with occasional cleaning of the panels to ensure optimal performance. Panel Lifespan: Solar panels generally last around 25-30 years, with a slight decline in efficiency over time. Inverter Lifespan: Inverters typically last around 10-15 years before needing replacement. Conclusion: The 5 kW solar system installed by Universal Power Team at Nooh School will provide long-term benefits, including reduced electricity costs, environmental sustainability, and educational opportunities for students to learn about solar energy. If more detailed information is needed, contacting Universal Power Team or the school would provide the specifics of the installation.

Send Message

Still searching for
connection securely reconnect?