Gurugram
+918076792323

'automatic self test function'

Items tagged with 'automatic self test function'

product image
Powerstack battery Testing

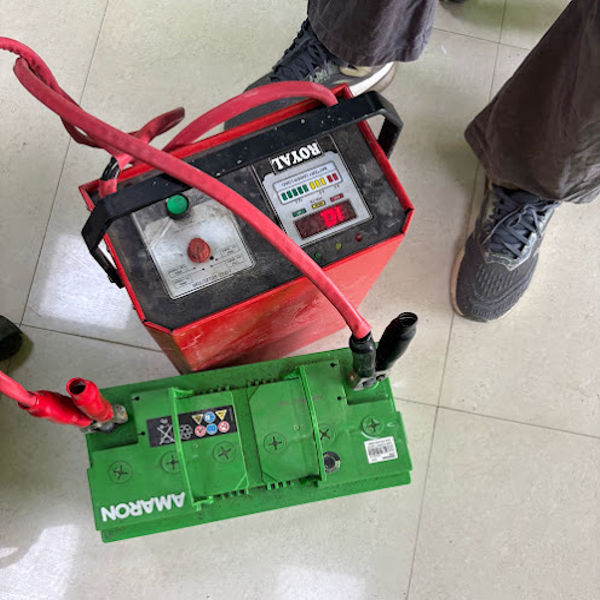
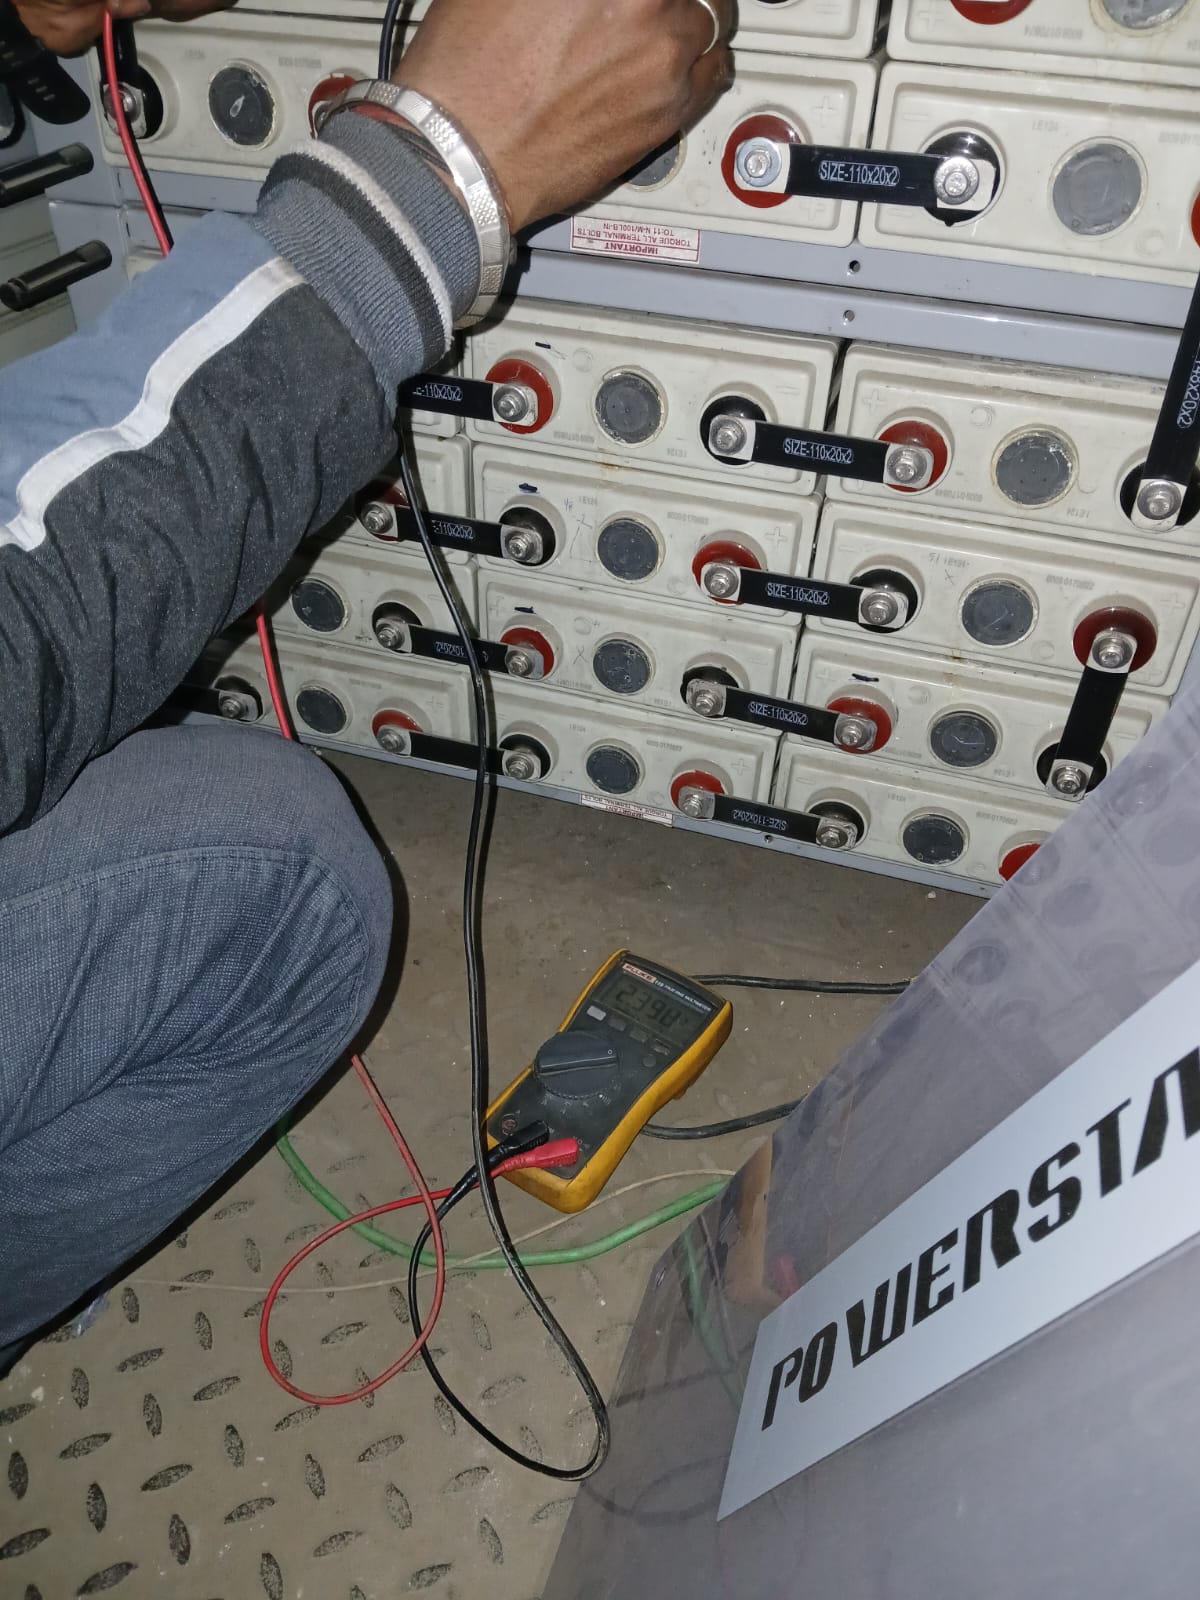
Powerstack batteries, typically used in UPS systems, inverters, and other energy storage applications, require proper testing and maintenance to ensure their efficiency, longevity, and reliability. If you need to perform battery testing on a Powerstack battery, here's a general guide for testing and monitoring its condition: Steps to Test Powerstack Batteries: 1. Visual Inspection Check for Physical Damage: Inspect the battery casing for any cracks, leaks, or bulges. Damaged batteries should be replaced. Clean the Terminals: Ensure the terminals are clean and free from corrosion. If there is any corrosion, clean the terminals with a mixture of baking soda and water. 2. Check Battery Voltage Measure the Open-Circuit Voltage (OCV): Use a digital voltmeter to measure the voltage across the battery terminals when it is not connected to any load. Compare the measured voltage to the battery’s rated voltage. A typical fully charged 12V lead-acid battery should read around 12.6 to 12.8 volts. For a 24V battery, you should see a voltage of around 25.2 to 26.0 volts. Undercharged Battery: If the voltage is significantly lower (e.g., 10.5V or less for a 12V battery), it may indicate that the battery is undercharged or faulty. 3. Load Testing Test under Load: Apply a load to the battery, simulating its normal working conditions. The load can be an inverter or UPS system that draws power from the battery. Monitor the voltage drop under load. The voltage should not drop drastically; otherwise, it may indicate that the battery is aging or weak. DC Discharge Test: If you have access to a battery analyzer or tester, you can perform a discharge test by applying a constant load and measuring the time it takes for the battery to reach a certain voltage cutoff. 4. Battery Charge Test Charge the Battery Fully: Use the manufacturer’s recommended charger to fully charge the battery. Most Powerstack systems will charge to full capacity in 6-12 hours, depending on the charger and battery size. Monitor Charging Parameters: If the battery doesn’t charge properly or takes longer than usual, it might indicate problems with the battery or the charger. End of Charge Voltage: For lead-acid batteries, the end-of-charge voltage should be around 14.4 to 15.0 volts for a 12V battery and 28.8 to 30.0 volts for a 24V battery. 5. Conduct a Specific Gravity Test (for Lead-Acid Batteries) Hydrometer Test: If your Powerstack battery is a lead-acid type, you can measure the specific gravity of the electrolyte inside the battery using a hydrometer. A fully charged battery will have a specific gravity of around 1.265 – 1.280. If the reading is low, it may indicate that one or more cells are faulty. 6. Perform a Battery Health Check (Advanced) Use a Battery Tester: There are advanced battery testers that can measure the internal resistance, capacity, and health of the battery. These testers usually simulate various load conditions and measure how well the battery performs. Internal Resistance: A higher internal resistance indicates aging and reduced capacity. A proper battery tester will show you this resistance reading, which helps in assessing the battery's remaining life. 7. Monitor for Temperature Batteries can heat up during charging and discharging. Check for unusual temperature rises that may indicate internal problems. Excessive heat can degrade battery life and may signal an issue with the battery or the charging system. Signs of a Failing Battery: Rapid Voltage Drop: If the voltage quickly drops under load, the battery is likely deteriorating. Short Runtime: If the battery runs out of charge much faster than expected, it could mean it's near the end of its life. Inconsistent Voltage Readings: Large fluctuations in voltage readings, especially when under load, can indicate a failing battery. Physical Damage: Swelling, leaks, or any visible damage to the battery indicates that it needs to be replaced. Battery Maintenance Tips: Regular Charging: Avoid deep discharges and always keep the battery charged. Environmental Conditions: Keep the battery in a cool, dry place to avoid overheating or damage due to extreme temperatures. Periodic Tests: Test the battery every 3-6 months to assess its health and ensure it’s functioning properly. Use the Right Charger: Always use the manufacturer's recommended charger to prevent overcharging or undercharging. Conclusion: Battery testing is critical for ensuring that your Powerstack battery continues to perform optimally. Regular testing helps in identifying potential problems early and maintaining the battery’s health. Always follow the manufacturer’s instructions and consult with a professional if you're unsure about the testing process.

Send Message
product image
Maintenance Tips for UPS Systems and Batteries​

Maintaining your Uninterruptible Power Supply (UPS) system and its batteries is crucial for ensuring reliable performance and extending their lifespan. Here are some essential maintenance tips: 1. Regular Inspection Visual Checks: Inspect the UPS and batteries for any signs of physical damage, leaks, or corrosion. Connections: Ensure that all connections are secure and free from dust and corrosion. 2. Battery Maintenance Battery Testing: Regularly test the batteries for capacity and performance. Use a battery tester to check voltage and load. Clean Terminals: Keep battery terminals clean and free from corrosion. Use a mixture of baking soda and water to clean any corrosion, and ensure terminals are dry before reconnecting. Check Electrolyte Levels: For flooded lead-acid batteries, check the electrolyte levels regularly and top up with distilled water as needed. 3. Environmental Considerations Temperature Control: Keep the UPS and batteries in a cool, dry environment. High temperatures can reduce battery life significantly. Ventilation: Ensure proper ventilation around the UPS to prevent overheating. Avoid placing it in enclosed spaces without airflow. 4. Regular Testing Self-Test: Perform regular self-tests to ensure the UPS is functioning correctly. Most UPS systems have a built-in self-test feature. Load Testing: Conduct load tests periodically to ensure the UPS can handle the required load during a power outage. 5. Firmware and Software Updates Keep Software Updated: Regularly check for and install firmware updates for your UPS. This can improve performance and security. Monitoring Software: Use UPS monitoring software to track performance metrics and receive alerts for any issues. 6. Battery Replacement Follow Manufacturer Guidelines: Replace batteries according to the manufacturer\'s recommendations, typically every 3-5 years for lead-acid batteries. Dispose of Batteries Properly: Follow local regulations for the disposal of batteries to ensure environmental safety. 7. Load Management Avoid Overloading: Ensure that the total load connected to the UPS does not exceed its rated capacity. This can lead to overheating and reduced battery life. Balanced Load: Distribute the load evenly across all outlets to prevent any single outlet from being overloaded. 8. Documentation Keep Records: Maintain a log of maintenance activities, battery replacements, and any issues encountered. This can help in troubleshooting and planning future maintenance. 9. Professional Maintenance Schedule Professional Inspections: Consider having a qualified technician perform regular inspections and maintenance, especially for larger UPS systems. 10. User Training Educate Staff: Train staff on the proper use and maintenance of the UPS system, including how to respond in case of a power outage.

Send Message
product image
UPS

The VERTIV Liebert ITON CX 1000VA UPS is a line-interactive uninterruptible power supply designed for home and small office use. Below are the details regarding its unboxing and quick testing. Unboxing Details Packaging: The UPS comes securely packaged to prevent damage during transit. Ensure to check for any visible signs of damage upon receipt. Included Items: VERTIV Liebert ITON CX 1000VA UPS unit User manual and installation guide Power cord with UK outlet Warranty card Initial Inspection: Check the UPS for any physical damage. Verify that all components are included as per the manual. Quick Test Procedure Setup: Place the UPS in a well-ventilated area. Connect the power cord to the UPS and plug it into a wall outlet. Power On: Press the power button to turn on the UPS. Observe the LED indicators: Green Light: Indicates AC mode (normal operation). Red Light: Indicates a fault condition. Battery Mode Test: To test the battery mode, disconnect the UPS from the wall outlet. Ensure that the UPS switches to battery mode automatically. Check the runtime by connecting a load (e.g., a computer) and monitor how long the UPS can sustain power. Load Testing: Connect a load that draws approximately 120W (e.g., a standard desktop computer). Monitor the backup time, which should be around 30 minutes under this load. Recharge Time: After the test, reconnect the UPS to the wall outlet. Note that the typical recharge time is 6-8 hours to reach 90% capacity. Key Specifications Power Capacity: 1000 VA / 600 Watts Input Voltage: 220/230 VAC Output Waveform: Simulated Sine Wave Transfer Time: 2-6 ms Battery Type: 12 V / 7 Ah x 2 Typical Backup Time: 30 minutes at 120W load Dimensions: 369 x 141 x 160 mm Weight: 10 kg Conclusion The VERTIV Liebert ITON CX 1000VA UPS is a reliable solution for power protection in small setups. The unboxing and quick test confirm its functionality and performance, making it a suitable choice for users needing uninterrupted power supply for their electronic devices. Always refer to the user manual for detailed instructions and safety precautions.

Send Message
product image
UPS Rental & UPS Repairing Service

Repairing a Vertiv 1 kVA UPS involves a systematic approach to diagnosing and fixing issues. Here’s a detailed overview of the repair process, common problems, and considerations specific to Vertiv UPS systems: Repair Process Initial Assessment Gather Information: Document symptoms such as alarms, performance issues, or failure to start. Visual Inspection: Look for signs of physical damage, burnt components, or loose connections. Diagnosis Self-Diagnostic Tests: Many Vertiv UPS units have built-in diagnostic tools. Run these tests to identify fault codes. Multimeter Testing: Use a multimeter to check voltage levels, current, and resistance. Battery Health Check: Test the battery using a dedicated battery tester or multimeter to check for voltage and capacity. Inspect Fuses and Circuit Breakers: Check for blown fuses or tripped circuit breakers that could indicate a fault. Common Issues Battery Failure: The most common issue; batteries may need replacement due to age or improper charging. Capacitor Issues: Capacitors can degrade over time, leading to performance problems. Overheating: Caused by dust accumulation, blocked ventilation, or fan failure. Control Board Failures: Issues with the control board can affect functionality. Input/Output Problems: Fluctuations in input power or output voltage can indicate deeper electrical issues. Repair and Replacement Battery Replacement: Carefully remove old batteries and install new ones, ensuring correct polarity. Component Replacement: Replace any faulty components, such as capacitors or fuses, as identified during diagnostics. Soldering and Repairing Connections: Resolder any loose or damaged connections on the circuit board. Firmware Updates: If applicable, update the firmware for optimal performance. Testing After Repair Functional Testing: Run the UPS to ensure it operates correctly. Load Testing: Test under load conditions to verify performance and capacity. Battery Discharge Test: Simulate a power outage to ensure the UPS provides backup power as expected. Final Inspection Safety Checks: Verify that all repairs meet safety standards. Documentation: Record all repairs, parts replaced, and any other relevant information for future reference. Maintenance Tips Regular Testing: Conduct periodic self-tests and inspections to identify potential issues early. Battery Maintenance: Keep battery terminals clean and ensure connections are tight. Cooling: Ensure proper ventilation around the UPS to prevent overheating. Environment: Keep the UPS in a controlled environment, away from moisture and extreme temperatures. When to Seek Professional Help If issues are complex or beyond basic troubleshooting, consult a professional service. Use authorized Vertiv service centers for repairs to ensure quality and warranty compliance. Conclusion Repairing a Vertiv 1 kVA UPS requires careful diagnosis and knowledge of electrical systems. Regular maintenance can help prevent many common issues, ensuring reliable performance. For more complicated repairs, seeking professional help is recommended to ensure safety and effectiveness.

Send Message
product image
UPS Repair

Repairing uninterruptible power supplies (UPS) involves a series of steps to diagnose and fix issues, ensuring they operate reliably. Here’s a comprehensive overview of the UPS repair process, common issues, and considerations: UPS Repair Process Initial Assessment Identify Symptoms: Gather information on the symptoms or problems, such as failure to start, battery issues, or alarms. Visual Inspection: Check for any visible damage, such as burned components, corrosion, or loose connections. Diagnosis Self-Diagnostics: Utilize built-in self-test features, if available, to diagnose issues. Multimeter Testing: Measure voltage, current, and resistance to identify electrical issues. Battery Testing: Check the health of the batteries using a battery tester or multimeter. Check Fuses and Circuit Breakers: Ensure all fuses and breakers are intact and functioning. Common Issues Battery Failure: Batteries may need replacement due to age or over-discharge. Capacitor Issues: Capacitors can fail due to heat or age, leading to performance issues. Cooling Problems: Blocked fans or insufficient ventilation can cause overheating. Control Board Malfunctions: Issues with the control board can affect the UPS's operation. Input/Output Issues: Problems with input power or output voltage can indicate faults in the UPS circuitry. Repair and Replacement Battery Replacement: Remove and replace old batteries with new ones of the same specifications. Component Replacement: Replace faulty capacitors, fuses, or other components as diagnosed. Resoldering Connections: Fix any broken or loose solder joints on the circuit board. Software/Firmware Updates: If applicable, update the UPS firmware to ensure optimal performance. Testing After Repair Functional Testing: After repairs, perform a complete functional test of the UPS. Load Testing: Test the UPS under load to ensure it can handle the required capacity. Battery Cycle Testing: Run the UPS on battery power to check for proper operation. Final Inspection Safety Check: Ensure all repairs meet safety standards. Documentation: Document the repairs, parts replaced, and any other relevant information for future reference. Maintenance Tips Regular Testing: Conduct regular self-tests and inspections to catch issues early. Battery Maintenance: Check battery connections and terminals periodically; keep them clean and tight. Environment Control: Ensure the UPS is kept in a cool, dry environment to extend its lifespan. Firmware Updates: Keep the UPS firmware updated for improved performance and security. Professional Repair Services When to Seek Help: If the issue is beyond basic troubleshooting or involves complex repairs, it’s best to consult a professional. Authorized Service Centers: Consider using authorized repair services for specific brands to ensure quality repairs. Conclusion Repairing a UPS requires careful diagnosis, knowledge of electrical systems, and attention to safety. Regular maintenance can help prevent many issues, ensuring your UPS remains reliable in providing backup power when needed. For complex repairs, professional services are recommended to ensure the job is done safely and effectively.

Send Message
product image
Apc Ups Repairing And Maintenance In Aurangabad Sonipat

Repairing and testing an APC UPS (Uninterruptible Power Supply) involves several steps to diagnose issues and ensure the unit functions properly. Here’s a detailed guide on how to approach this: Common Issues with APC UPS Battery Failure: Most common issue; symptoms include frequent beeping and inability to hold a charge. Overload: The UPS may beep continuously if connected devices exceed its capacity. Faulty Output: No power output despite being plugged in. Firmware Issues: May require updates or resets. Tools Needed Multimeter Screwdriver set Replacement batteries (if needed) Laptop or PC for firmware updates Diagnostic software (if applicable) Testing Procedure Visual Inspection: Check for physical damage, burnt components, or loose connections. Inspect the battery for any signs of swelling or leakage. Battery Testing: Disconnect the UPS from the wall outlet. Use a multimeter to measure the battery voltage. Compare it to the rated voltage (e.g., 12V for most lead-acid batteries). If the voltage is significantly lower, consider replacing the battery. Load Testing: Connect a load tester to the UPS and apply a known load (within the UPS capacity). Monitor the output voltage and see if it remains stable under load. Output Testing: Plug the UPS into the wall and turn it on. Measure the output voltage with a multimeter to ensure it’s delivering the correct voltage (typically around 120V or 230V depending on your region). Check if the UPS switches to battery mode when you disconnect it from the wall. Overload Testing: Gradually increase the load on the UPS until it beeps or shuts down. Verify that it returns to normal operation once the overload is removed. Repair Procedures Battery Replacement: Follow the manufacturer’s guidelines for replacing batteries. Dispose of old batteries responsibly. Firmware Updates: Connect the UPS to a computer. Use APC’s software (like PowerChute) to check for and install firmware updates. Component Repair: If internal components (like capacitors or fans) are damaged, soldering skills may be required for repairs or replacements. Reassembly: Carefully reassemble the UPS, ensuring all screws are tightened and no wires are pinched. Final Testing After repairs, conduct a full load test to ensure the UPS operates correctly under stress. Monitor for any unusual noises or overheating during operation. Safety Precautions Always ensure the UPS is unplugged before performing internal inspections or repairs. Handle batteries with care, as they can be hazardous. Conclusion Regular testing and maintenance of your APC UPS can extend its lifespan and ensure reliable performance. If issues persist after self-repair attempts, consider consulting a professional technician or contacting APC support for assistance.

Send Message
product image
Apc Ups Repairing In Jawahar Colony Faridabad

Repairing an APC UPS (Uninterruptible Power Supply) involves troubleshooting and addressing common issues that can arise over time. Here’s a comprehensive guide to help you diagnose and repair your APC UPS: Safety Precautions Disconnect Power: Always unplug the UPS before performing any repairs or inspections. Use PPE: Wear safety goggles and gloves to protect against electric shock. Work in a Ventilated Area: Ensure good airflow to prevent overheating. Common Issues and Solutions 1. UPS Won't Turn On Check Power Source: Ensure the UPS is plugged in and the outlet is functional. Test the power cord for damage. Battery Issues: Inspect the battery for swelling, leaks, or corrosion. Use a multimeter to check battery voltage; if it's significantly low, it may need replacement. 2. Battery Replacement Identify Battery Type: Refer to the user manual for the specific battery model. Remove the Old Battery: Open the UPS case (usually requires a screwdriver). Disconnect the old battery, noting the connections. Install the New Battery: Connect the new battery securely. Close the UPS case and ensure all screws are tightened. 3. Overheating Check Ventilation: Ensure that the UPS is in a well-ventilated area. Clear any obstructions around vents. Inspect Fans: Check if the internal fans are operational. Clean any dust accumulation. 4. Frequent Alarms or Beeping Load Issues: Ensure that the connected load does not exceed the UPS capacity. Disconnect non-essential devices and see if the alarm stops. Battery Health: Run a self-test (if your model supports it) to check battery status. 5. Self-Test Failure Check Battery Voltage: Use a multimeter to check the voltage of the battery. Replace if below the recommended level. Internal Issues: If the self-test consistently fails, the internal circuitry might need inspection by a professional. Tools and Equipment Needed Multimeter (for voltage checks) Screwdriver set Replacement batteries (as needed) Cleaning cloth or compressed air (for dust removal) Safety equipment (gloves, goggles) General Repair Steps Visual Inspection: Check for any visible signs of damage, such as burnt components or damaged connectors. Inspect for loose wires and connections. Testing Components: Batteries: Measure the voltage and ensure it's within specifications. Fuses: Check fuses for continuity. Replace blown fuses as needed. Fans and Circuits: Ensure fans are operational and listen for unusual noises. Reassembly: After repairs, carefully reassemble the UPS. Ensure all screws and connections are secure before powering on. Testing the UPS: Once reassembled, plug in the UPS and perform a test by connecting a load. Monitor the UPS for any abnormal behavior. Conclusion Repairing an APC UPS can often be straightforward, particularly when it comes to replacing batteries or troubleshooting common issues. However, if the problem persists or if you are unsure about the repair process, it’s advisable to contact a professional technician or the manufacturer for support. Always refer to the specific user manual for detailed instructions related to your UPS model.

Send Message
product image
Battery Testing In Sonipat

Battery testing is essential to ensure optimal performance, safety, and longevity. Here are key details: Types of Tests: Voltage Test: Measures the battery's output voltage to check if it meets the specified range. Capacity Test: Assesses how much charge the battery can hold and deliver over time. Load Test: Simulates real-world usage to check how the battery performs under load. Internal Resistance Test: Evaluates the battery's internal resistance, indicating its health. Tools Used: Multimeter, hydrometer (for lead-acid batteries), battery analyzer, and load testers. Frequency: Regular testing is recommended, especially for backup power systems, to prevent unexpected failures. Indicators of a Faulty Battery: Low voltage, poor capacity, high internal resistance, or physical damage like swelling or leakage. Proper battery testing helps in proactive maintenance, ensuring reliability and safety.

Send Message
product image
Amaron Quanta 12v 42Ah Battery

The Amaron Quanta 42Ah (Ampere-hour) battery is a high-performance, maintenance-free lead-acid battery designed for use in UPS systems, inverters, and solar energy storage applications. It provides reliable power backup for a range of devices, especially in environments where power stability and uninterrupted performance are crucial. Key Features of Amaron Quanta 42Ah Battery: Capacity: 42Ah (Ampere-hour) – This means the battery can provide 42 amps of current for one hour, or a proportionally smaller amount of current over a longer period of time, depending on the load. Technology: Maintenance-Free: The Amaron Quanta series batteries are sealed lead-acid batteries (SLA) that do not require frequent maintenance or water refilling, making them very convenient and hassle-free. High Performance: Designed for high efficiency, the Amaron Quanta 42Ah battery offers good charge retention, ensuring long-lasting backup for your UPS or inverter. Deep Cycle Battery: This is a deep-cycle battery, meaning it is designed to handle deeper discharges compared to regular car batteries. It is well-suited for applications where the battery may be discharged and recharged frequently. Durability: Long Shelf Life: Amaron Quanta batteries have a good shelf life and can perform well over extended periods when properly stored. High-Temperature Tolerance: They are built to withstand a wide range of temperatures, making them suitable for varying environmental conditions. Design: Compact and Reliable: The battery is designed to be compact, reliable, and easy to install, especially in environments where space is a concern. Vibration Resistant: The battery is engineered to resist damage from vibration, ensuring its durability in various settings. Safety Features: Flame-Retardant Materials: The Amaron Quanta 42Ah battery uses flame-retardant materials to ensure safety in case of battery malfunction. Leak-Proof: Being a sealed battery, it minimizes the risk of acid leakage, which adds an extra layer of safety. Application Areas: UPS Systems: Provides backup power to computers, servers, and networking equipment. Inverter Systems: Used in residential and small commercial applications to ensure uninterrupted power during outages. Solar Energy Storage: Can be used as part of a solar energy storage system to store excess energy generated during the day for use at night. Warranty: The Amaron Quanta batteries often come with a 2-year warranty, depending on the region and purchase conditions. It is recommended to check with the seller or manufacturer for specific warranty details. General Specifications: Voltage: 12V (standard for most UPS and inverter batteries). Capacity: 42Ah. Type: Sealed Lead-Acid (SLA) or AGM (Absorbent Glass Mat). Charging Voltage: Typically around 14.4 to 15.0V for 12V batteries. Nominal Voltage: 12V. Dimensions: Typically around length: 200mm, width: 165mm, height: 175mm (varies slightly depending on specific model). Weight: Approximately 12-14 kg. Maintenance Tips for the Amaron Quanta 42Ah Battery: Regular Charging: Always ensure that the battery is fully charged and avoid discharging it completely to extend its lifespan. Storage: If you’re storing the battery for an extended period, make sure to store it in a cool, dry place and check the charge level periodically. Clean the Terminals: Ensure the terminals are clean and free of corrosion. Clean the terminals with a mixture of baking soda and water if needed. Avoid Overcharging: Always use a compatible charger to avoid overcharging the battery, which could damage it. Check for Leakage: While the battery is sealed, it's a good idea to check for any leaks, especially if the battery has been in use for a long time or is showing signs of wear. Battery Testing: To check the health of the Amaron Quanta 42Ah battery, you can follow these steps: Voltage Check: Use a voltmeter to check the voltage. A fully charged 12V battery should show between 12.6V to 12.8V. Load Test: Under load, if the voltage drops rapidly below 10.5V for a 12V battery, it may be a sign of degradation. Capacity Test: If your application requires it, you can perform a discharge test to check the battery's capacity. This involves discharging the battery with a known load and measuring how long it takes for the voltage to drop below a certain threshold. Conclusion: The Amaron Quanta 42Ah battery is a reliable and durable option for providing backup power in various applications, including UPS systems, inverters, and solar power storage. It offers maintenance-free operation, a long service life, and excellent temperature tolerance. By regularly maintaining and testing the battery, you can ensure that it continues to perform effectively over time.

Send Message

Still searching for
automatic self test function?